

前回からの続きなのじゃ。
ゆるりはプログラミングの基礎も勉強したことがなく、全くの素人。
そこで、わからない用語を調べるのに何度もお世話になったサイトが「分かりそう」で「分からない」でも「分かった」気になれるIT用語辞典です。
ゆる~く教えてくれるので、なんとなく理解できる優れものサイトです。

- OS:Windows 10/バージョン 21H2 (OS ビルド 19044.1706)
- プロセッサ:Intel(R) Core(TM) i7-7500U
- メモリ:DDR4 8GB
- マザーボード:L-NSS172-L
Node.jsをWSL2にインストールする
Node.jsをWSL2にインストールするのじゃ。
Node.jsはプログラマーさん側でJavascriptを使えるようにする環境であり、
WSL2(Windows Subsystem for Linux 2)とはWindows 10上でLinuxを動作させるための仕組みなのじゃ。
※2022.6.30追記:この方法でNode.js をインストールするとnpm(Node Package Manager)も自動的にインストールされるのじゃ。
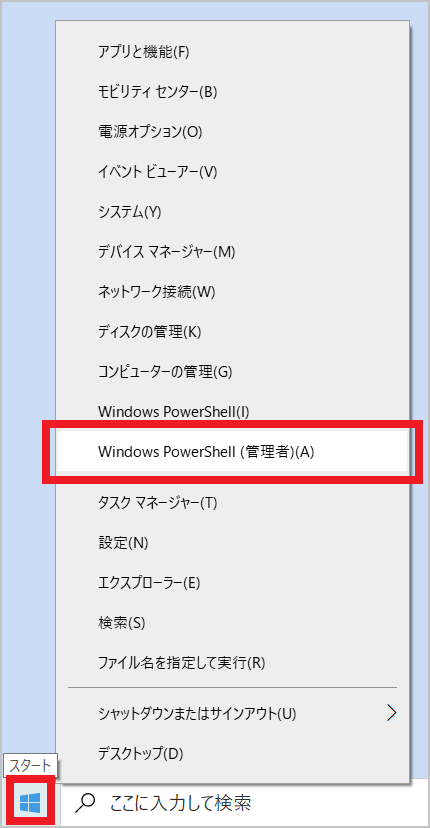
↓Windowsキーを右クリックし、Windows PowerShell(管理者)をクリックし起動する
↓「管理者:Windows PowerShell」に「wsl --install」と打ち込みEnter
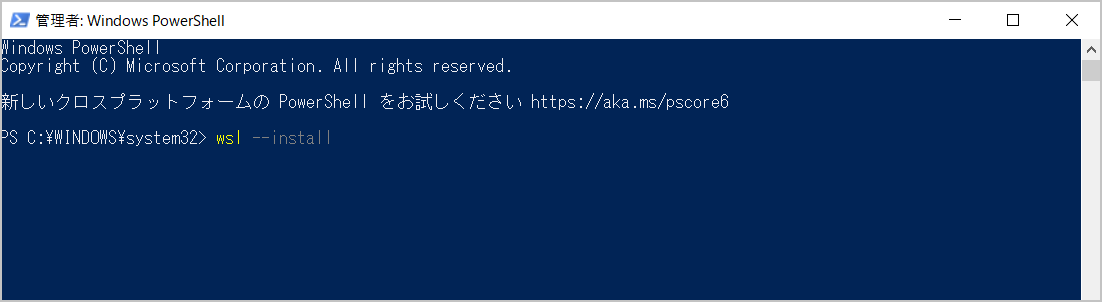
「Installing: Virtual Machine Platformうんぬんかんぬん」と表示される
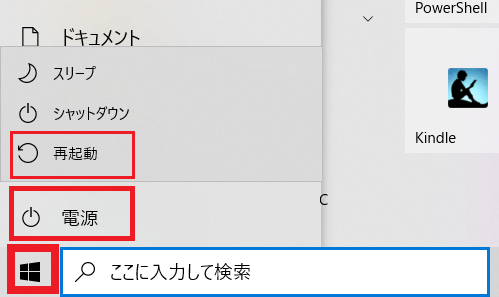
パソコンを再起動↓
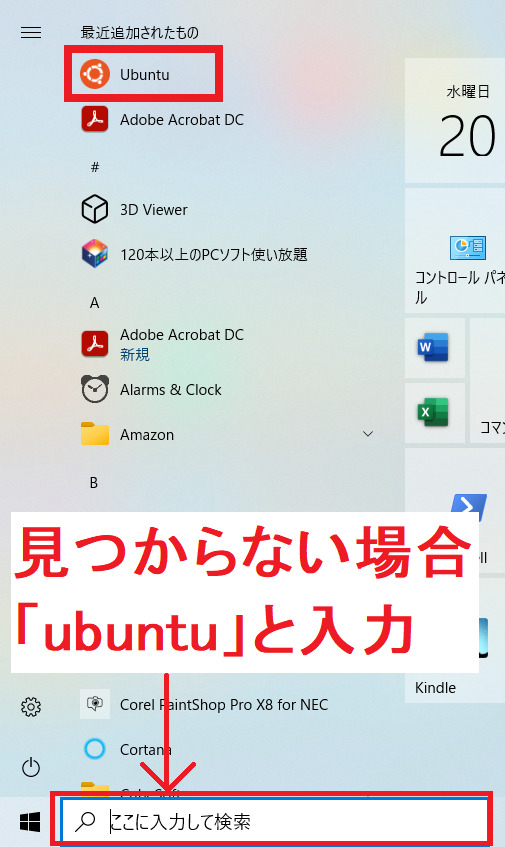
再起動後、スタートメニュー(Windowsマーク)から「Ubuntu」を立ち上げる↓
ユーザー名とパスワードを設定する↓
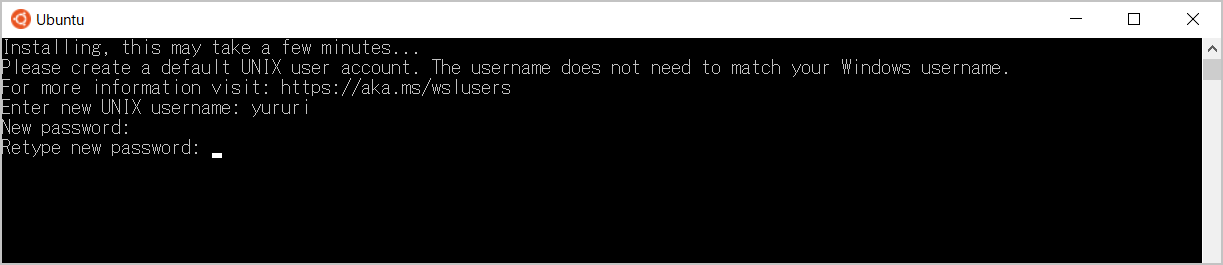
ちなみに「New password」と「Retype new password」は入力しても画面には表示されません。
初めてこのようなものを使ったゆるりはここでもつまづきました。
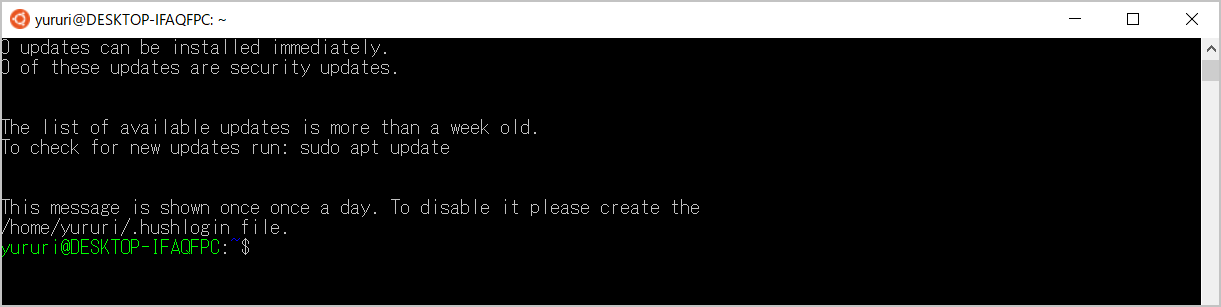
↓ダーッと色んな事が書かれて最終的に下記画像のようになれば、成功だと思われる
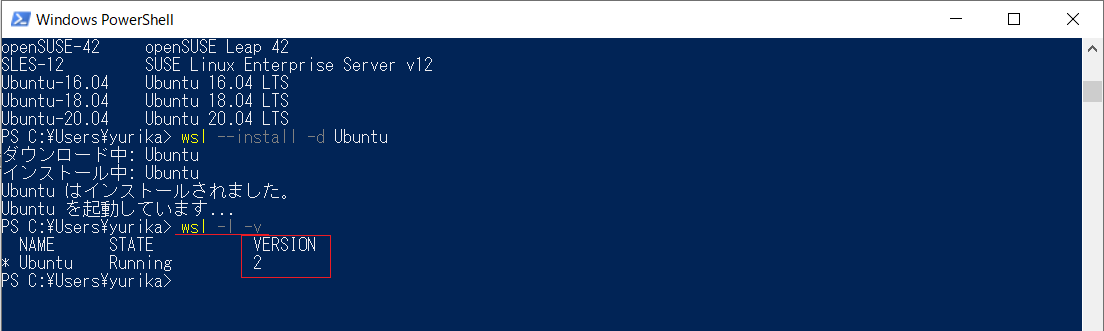
バージョンを確認してみる。PowerShellに「wsl -l -v」と入力しEnter↓
参考サイトにUbuntuでバージョンとコードネームを確認するようにと書いてあったので、一応確認する(なぜ確認するのかは不明)。
コマンドを実行↓
lsb_release -dc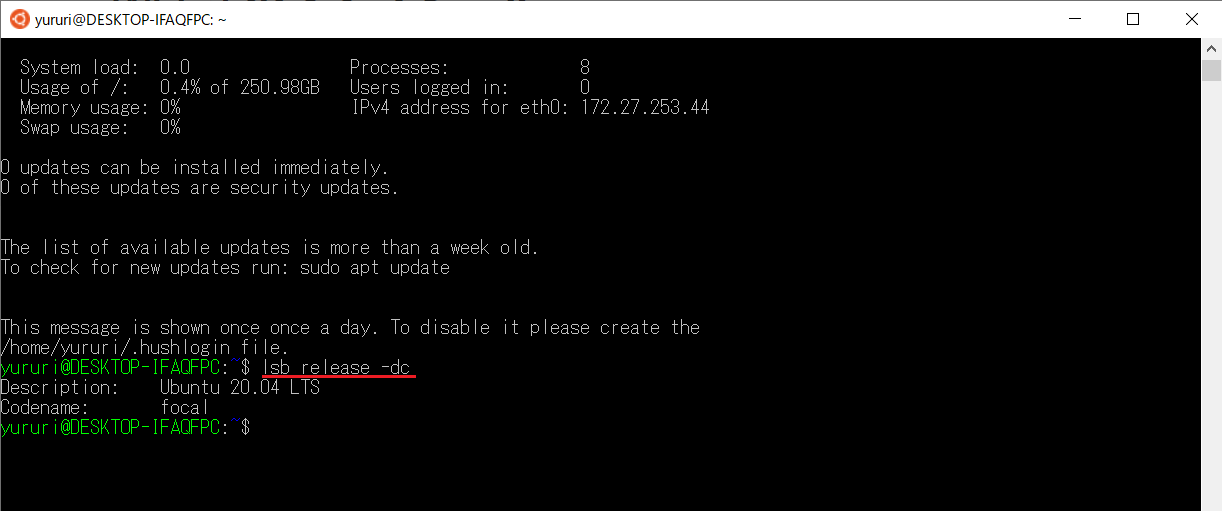
初めてこのようなものを使ったゆるりは、ここでもつまづく…。
貼り付け(Ctrl + V)を押しても入力されない…。
Ubuntuでは「マウスの右クリック」が「Ctrl + V」の代わりのボタンだったのです‼
Ubuntuの更新をする
①コマンドを実行↓
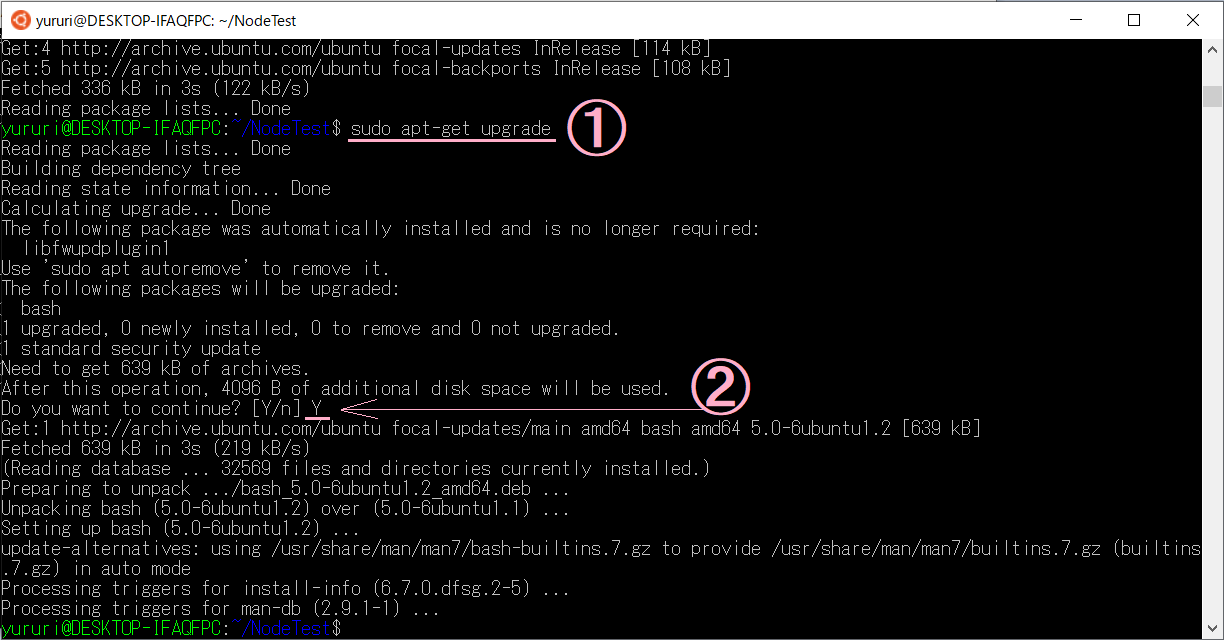
sudo apt update && sudo apt upgrade②パスワードを実行↓
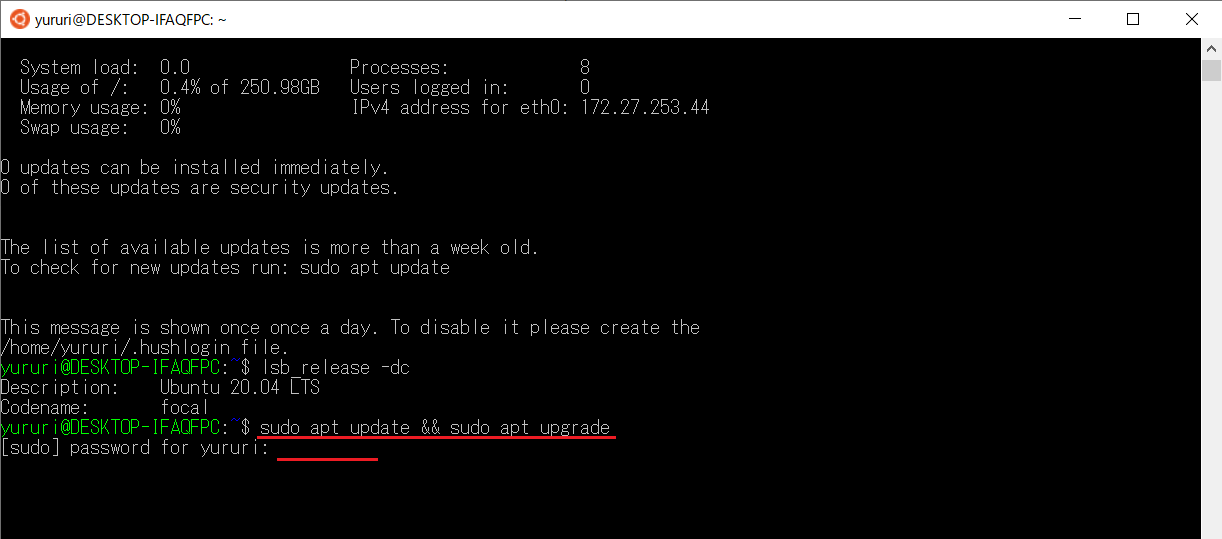
実行(Enter)を押すとこんなことになる↓
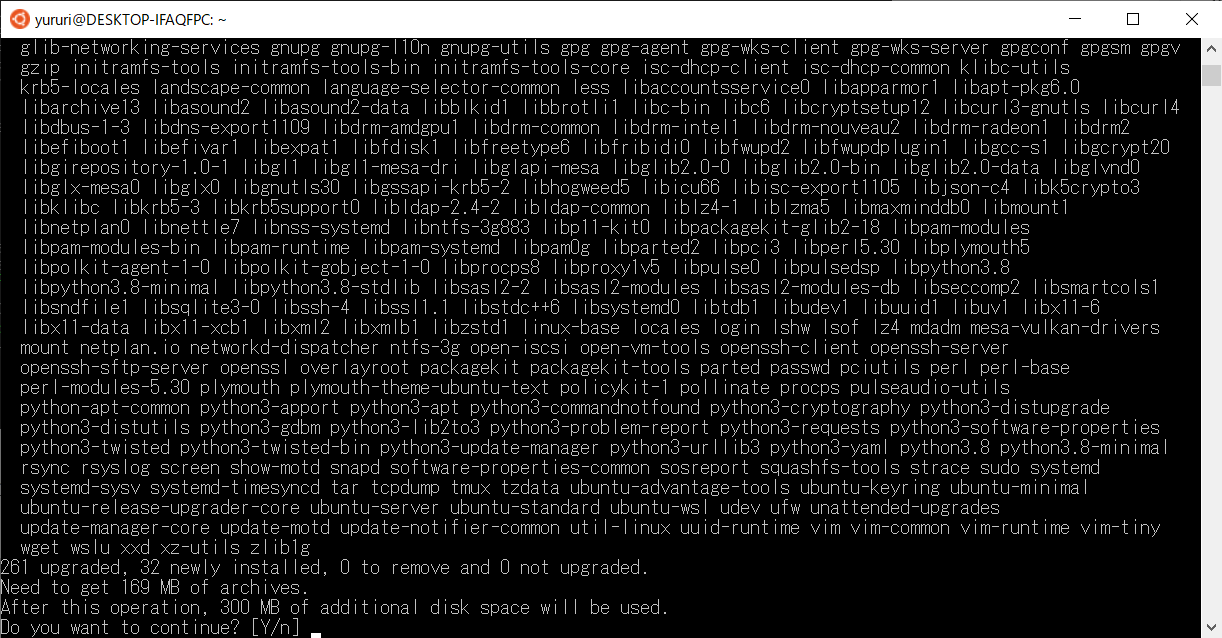
「まだ続けたいのか?」というようなことをきかれているようなので、「Y」(Yesのことだろう)と入力する↓
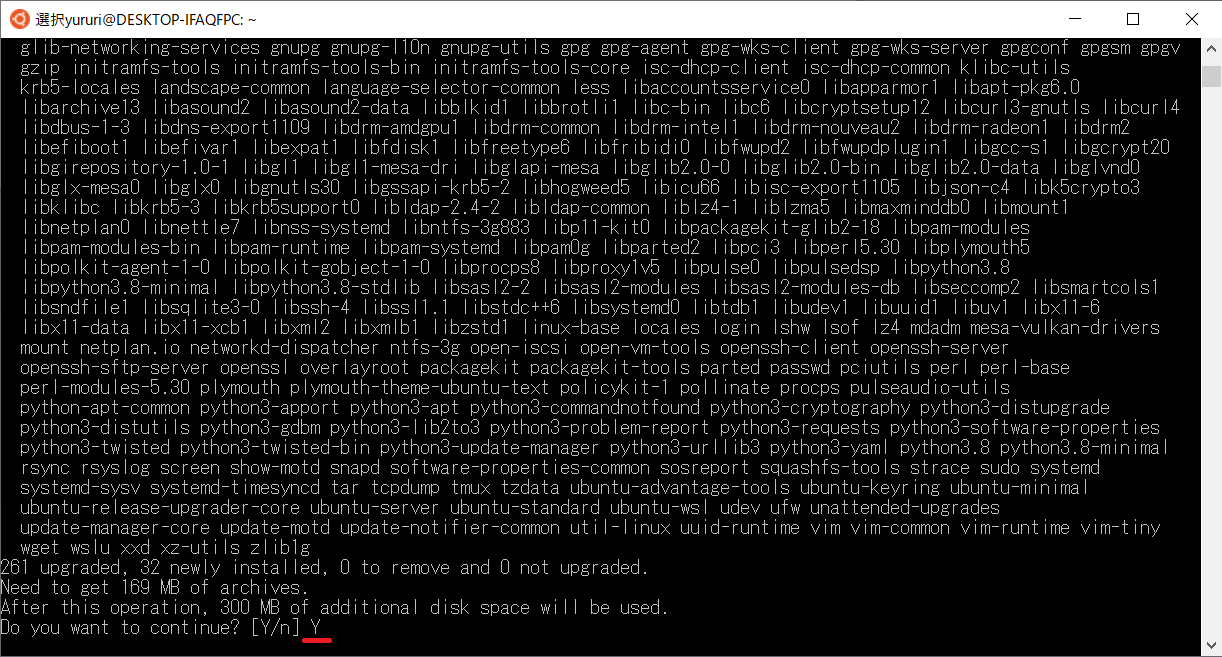
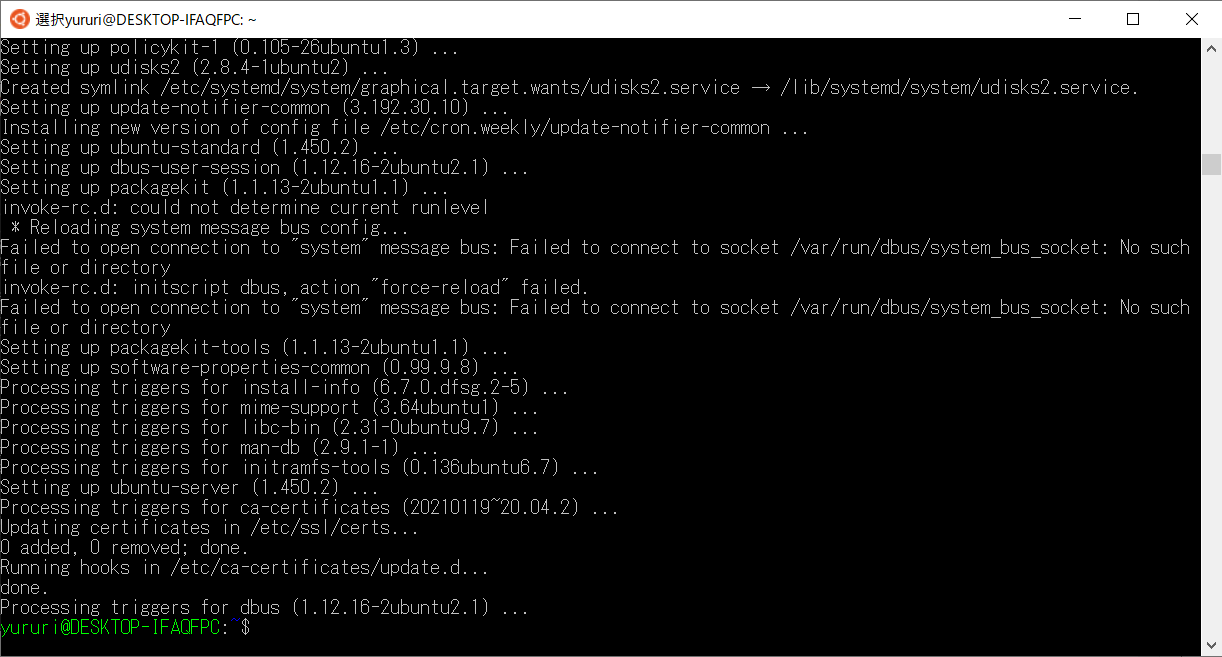
実行(Enter)を押すとこんなことになる↓

終わったようだ↓
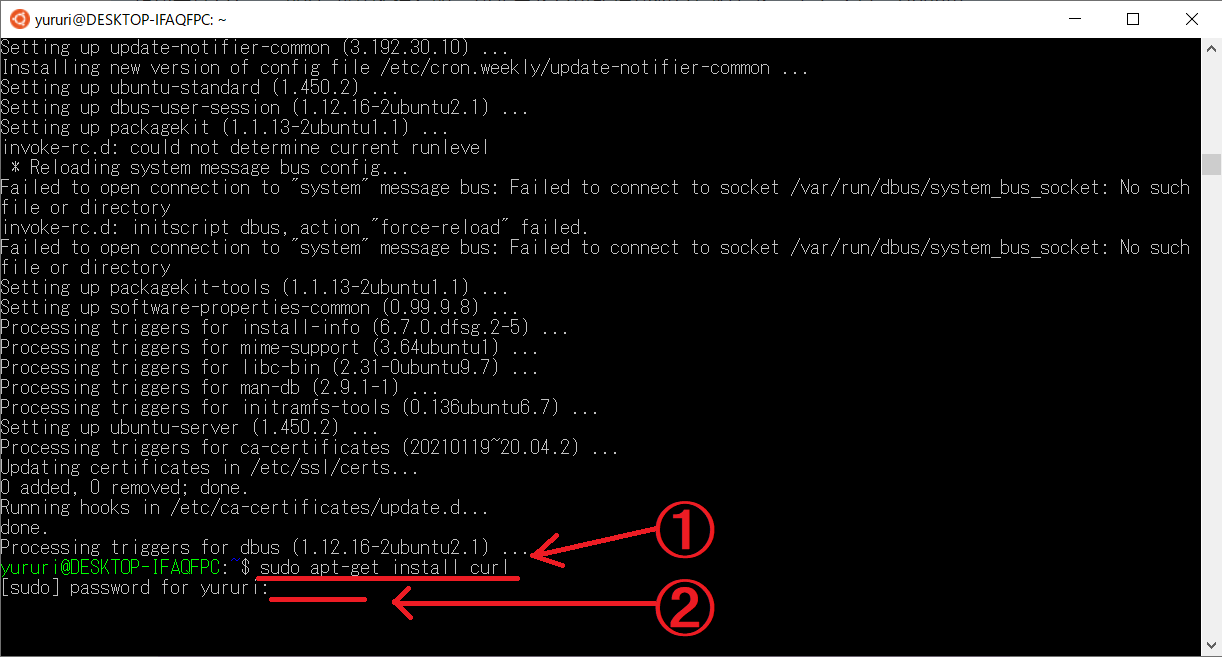
続けてcURLをインストールする(コマンドラインでインターネットからコンテンツをダウンロードするために使用するツールだそうだ)。
①コマンドを実行↓
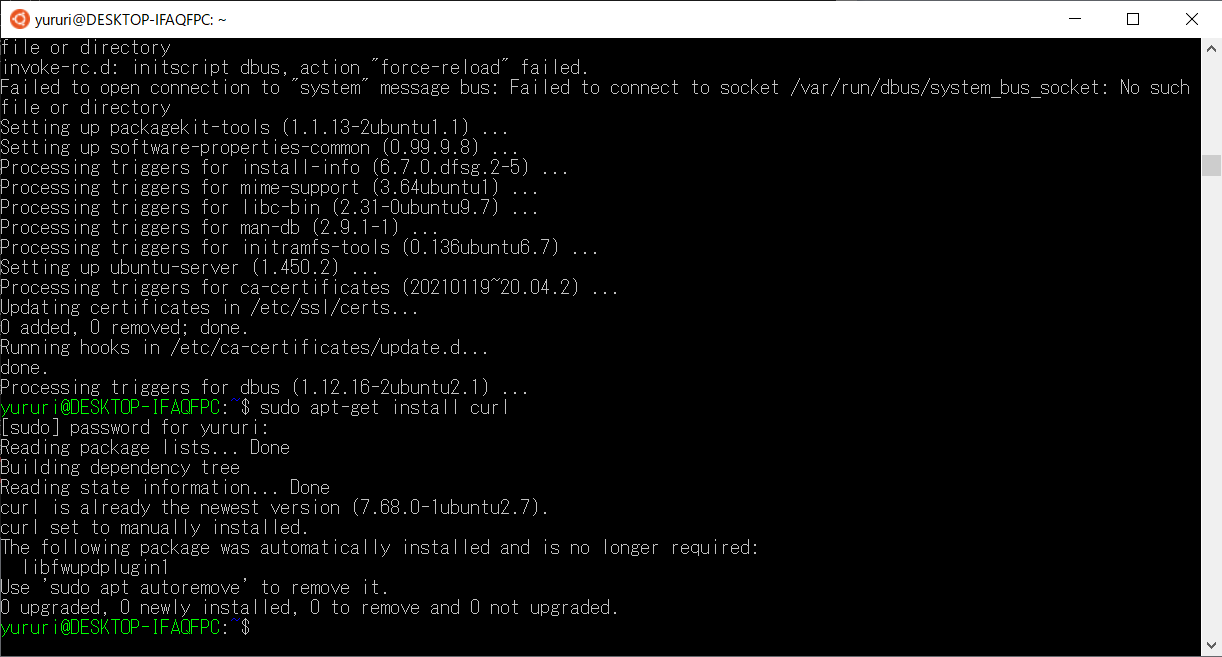
sudo apt-get install curl②パスワードを実行↓
↓今回はすぐ終わった
nvm(Node Version Manager/ノード・バージョン管理ツール) をインストールする。
コマンドを実行↓
curl -o- https://raw.githubusercontent.com/nvm-sh/nvm/v0.39.1/install.sh | bash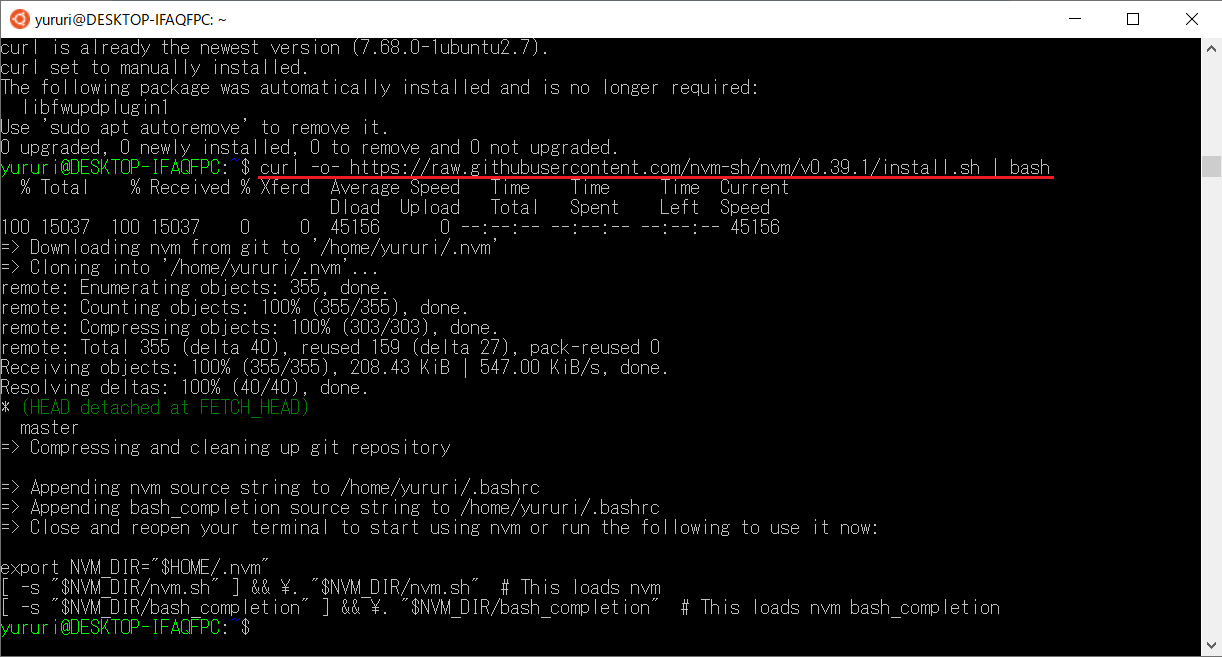
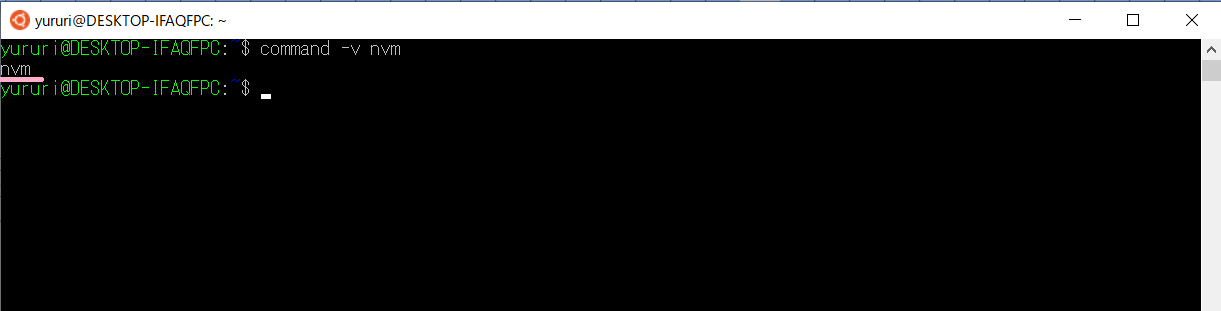
インストールを確認する。
コマンドを実行↓
command -v nvm「nvm」 と返されるはずが何も応答がない…↓
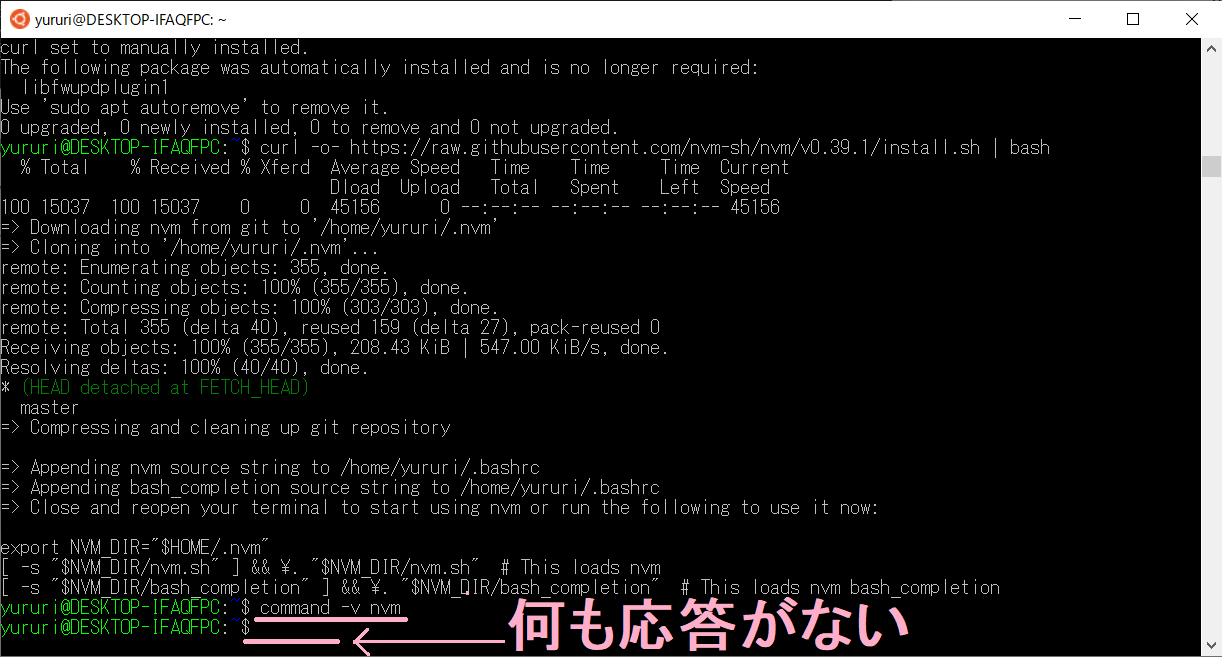
“コマンドが見つかりません” というメッセージが返される場合、または何も応答がない場合は、Ubuntuを閉じてから再度開き、もう一度やり直してくださいと公式に書いてあるので、その通りにすると無事 「nvm」 と返ってきた↓
現在インストールされている Node のバージョンを一覧表示する。(この時点では何もないらしい)
コマンドを実行する↓
nvm ls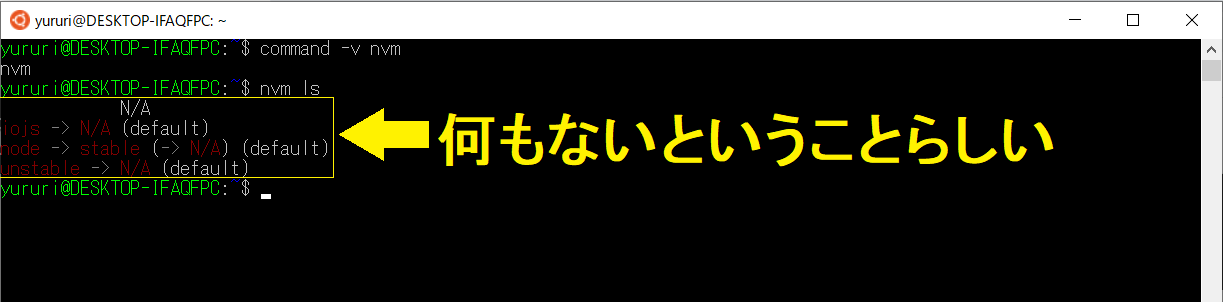
Node.js の最新リリースをインストールする。
コマンドを実行↓
nvm install node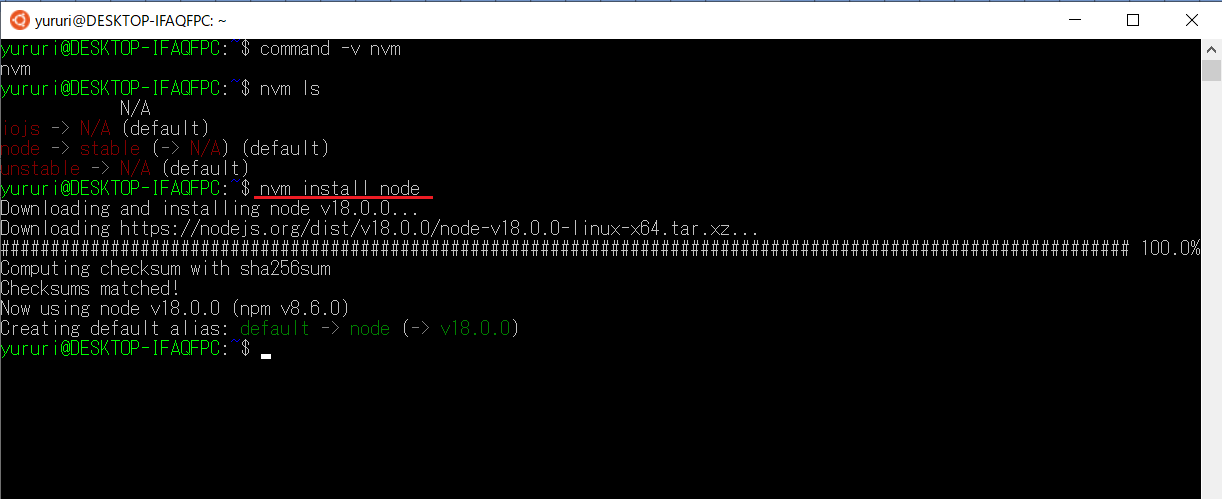
Node.js の安定した LTSリリースをインストールする。
コマンドを実行↓
nvm install --lts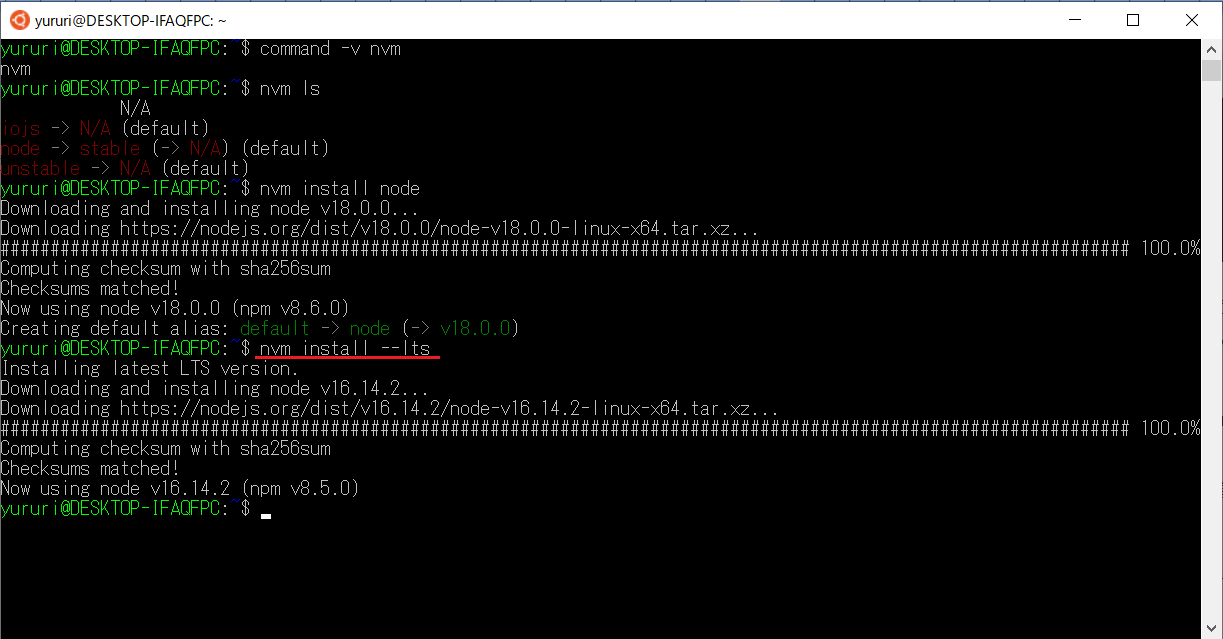
インストールされている Node のバージョンを一覧表示する。
コマンドを実行↓
nvm ls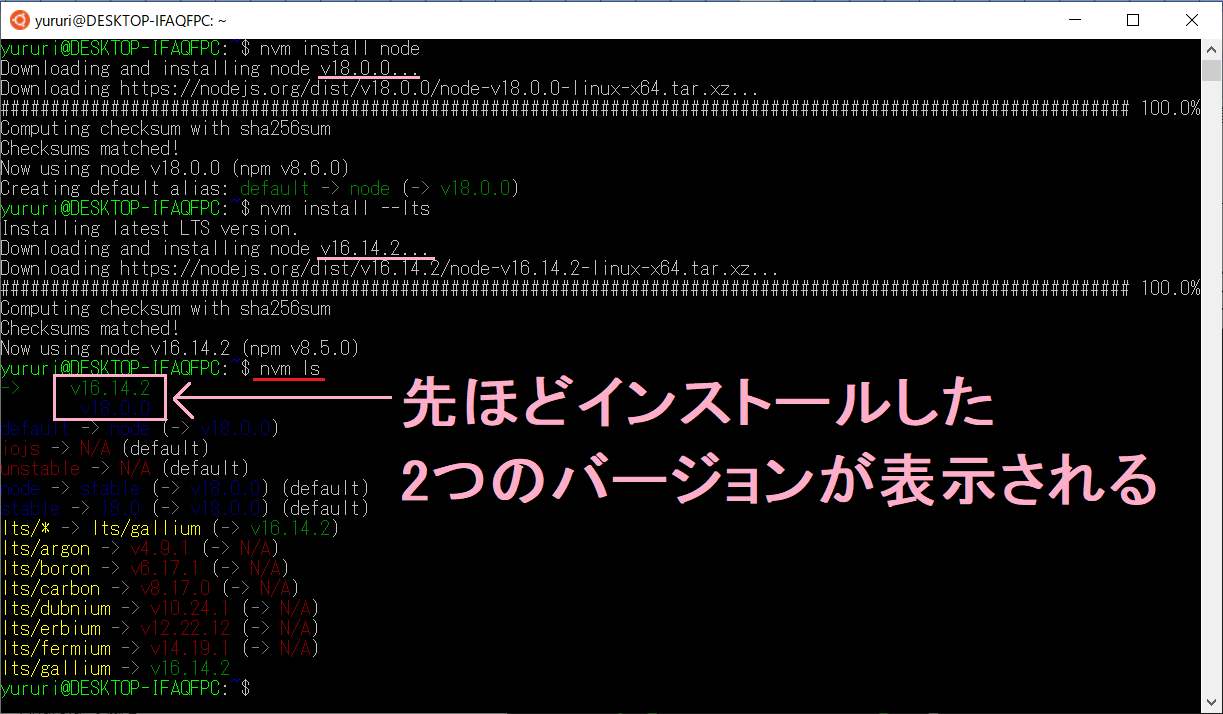
Node.js がインストールされていて、安定した LTS リリースバージョンであることを確認する。
コマンドを実行↓
node --version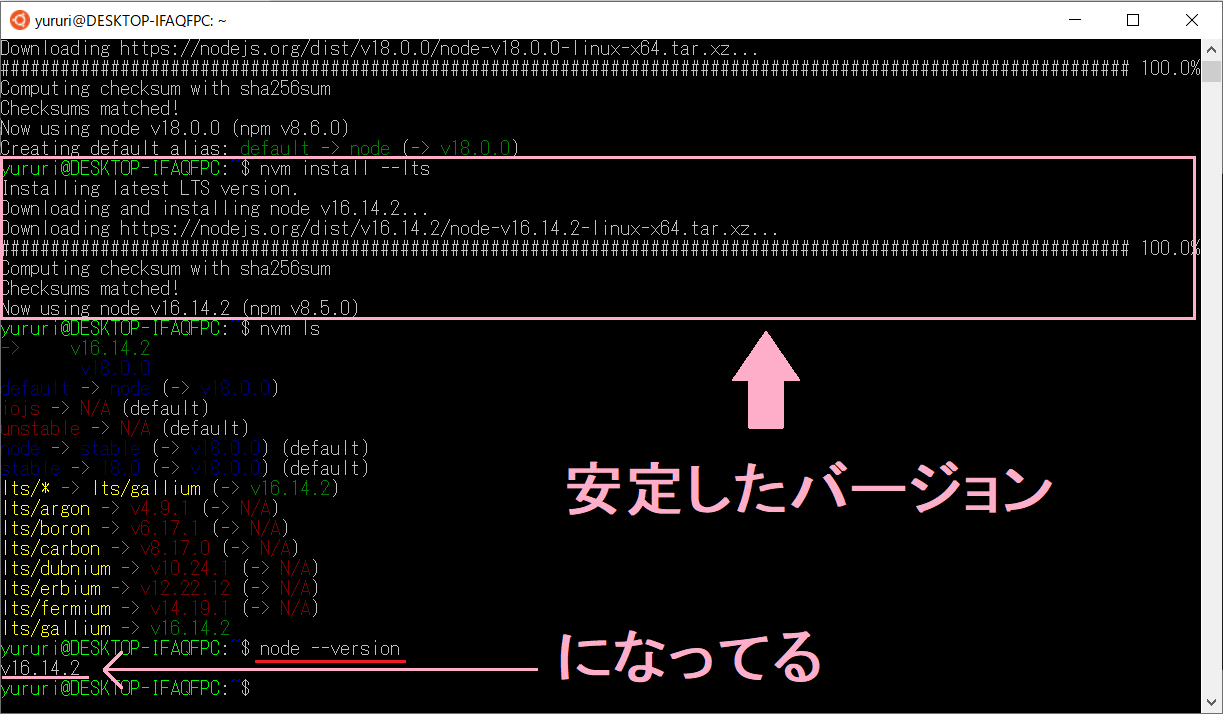
npmも安定バージョンか確認する。
コマンドを実行↓
npm --version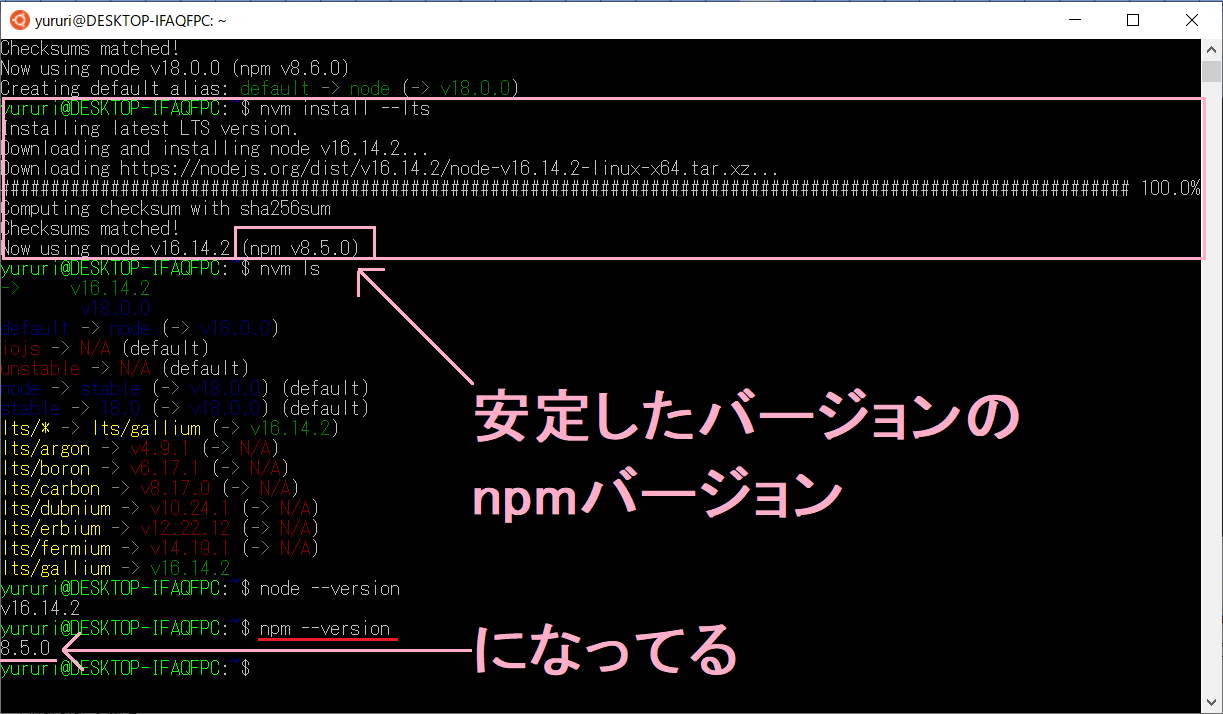
Gethをインストールする
スマートコントラクトやdApps(分散型アプリケーション)を作るためには、Ethereumという環境(プラットフォーム)を使ってEthereumのP2Pネットワークに参加する必要があるのじゃ。
P2Pネットワークに参加するためには、Ethereumクライアントをインストールし起動。
そこでEthereumで推奨されている「Geth」というEthereumクライアントをインストールするのじゃ。
「Geth」は他にもETHの採掘(マイニング)・送金、トランザクションの生成・ブロックチェーンの確認などができるのじゃ。
「Geth」はgo-ethereumの略で、Goというプログラミング言語で実装されたスマートコントラクトのクライアントなんだって。
P2Pネットワークで自動で契約を執行するプログラムを実行してくれるらしいよ。
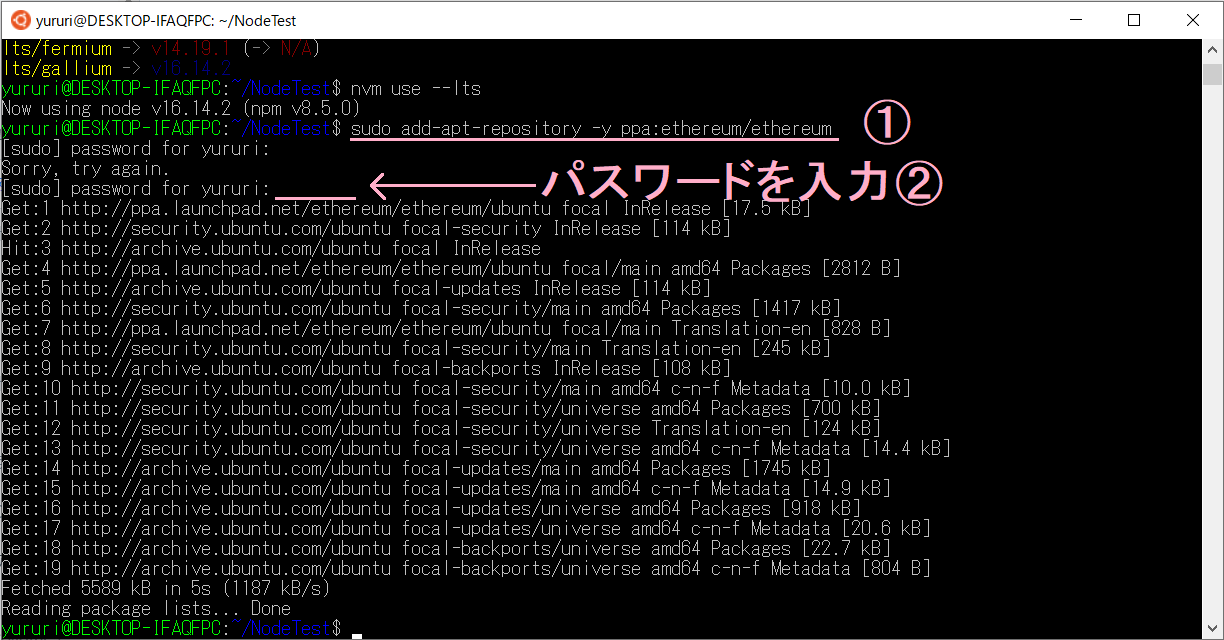
①コマンドを実行↓
sudo add-apt-repository -y ppa:ethereum/ethereum(①の下の行について:パスワードを一度間違え「Sorry, try again」と言われた)
↓②パスワードを実行
①コマンドを実行↓
sudo apt-get update↓②パスワードを実行
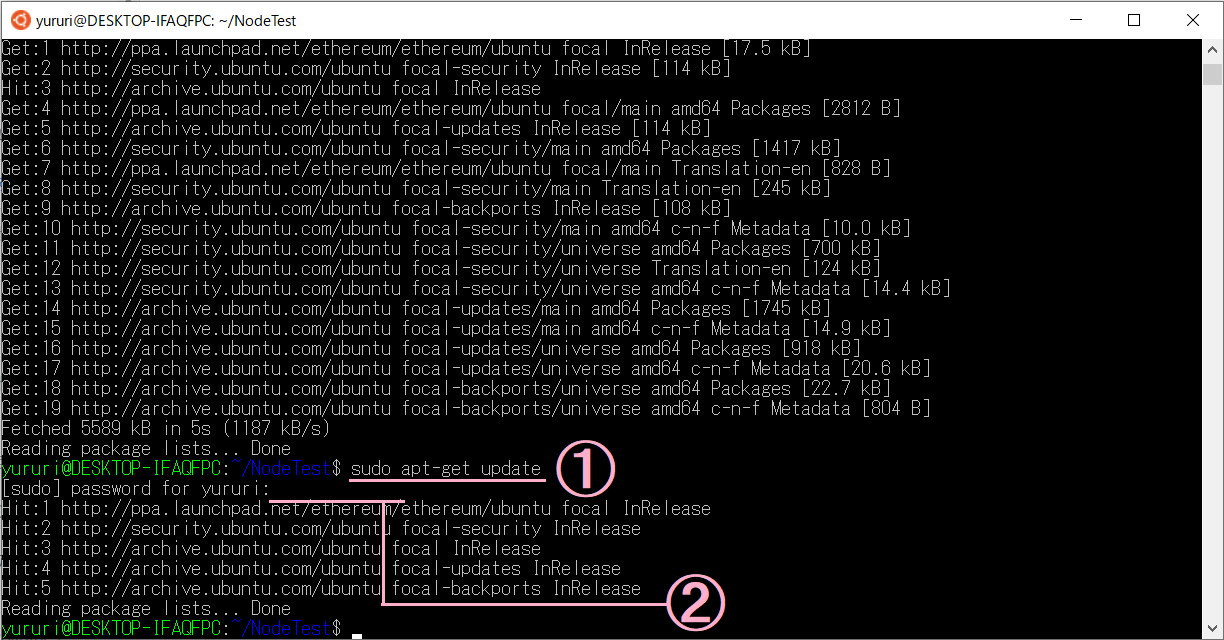
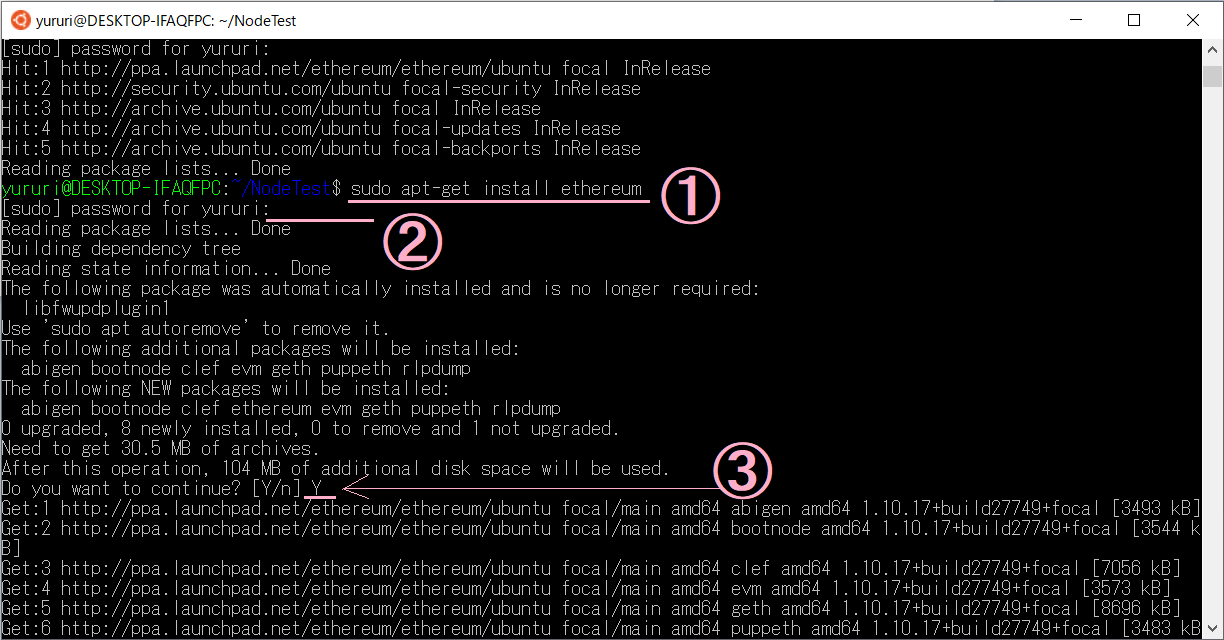
①コマンドを実行↓
sudo apt-get install ethereum②パスワードを実行
③続けたいかと質問してくるので「Y」を実行↓
gethがインストールされたかを確認する
↓コマンドを実行
geth --help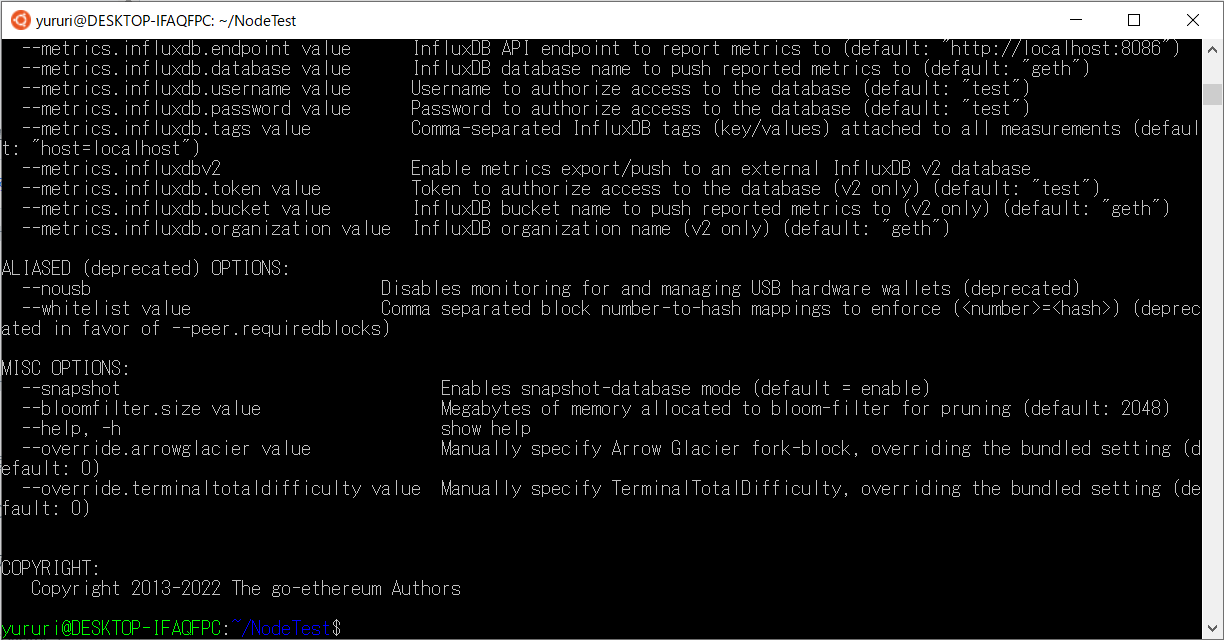
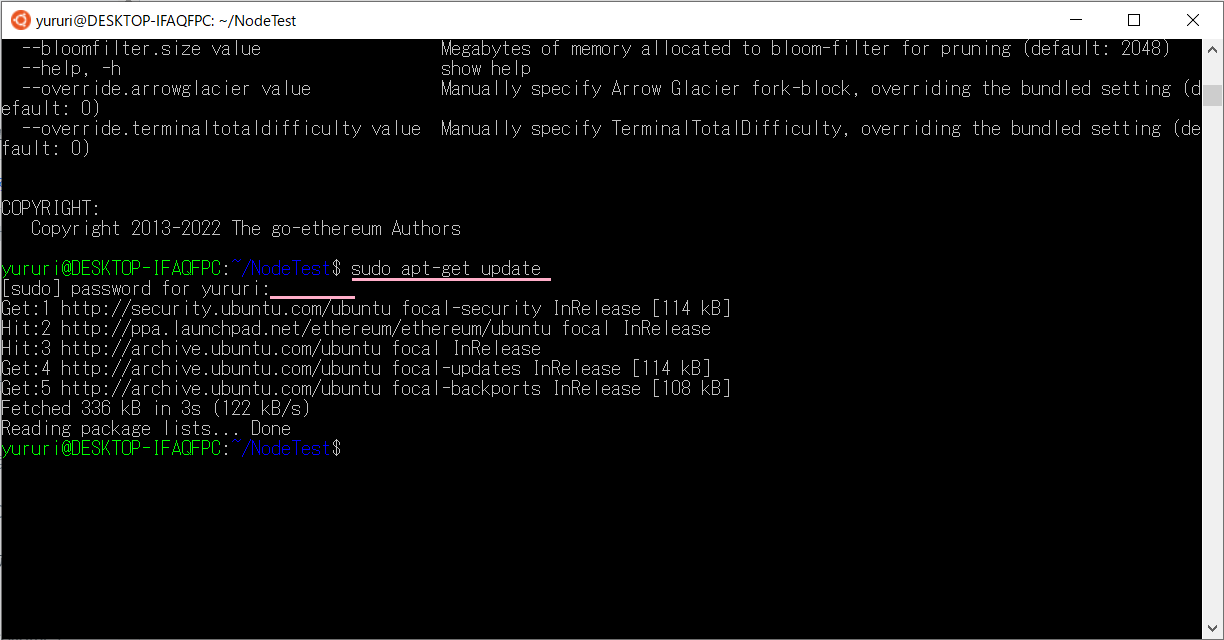
Gethのアップデートをする
①コマンドを実行↓
sudo apt-get update②パスワードを実行↓
Gethのアップグレードをする
①コマンドを実行↓
sudo apt-get upgrade②続けたいかと質問してくるので「Y」を実行↓
Gethをプライベート(テスト)ネットワークに接続する
Gethをプライベート(テスト)ネットワークに接続するのじゃ。
本番のネットワークにいきなり接続するとバグや不具合があったら大変なことになる場合もあるので、スマートコントラクトがちゃんと機能するのかなどをテストするプライベート(テスト)ネットワークを作成して、そこに接続するのじゃ。
データディレクトリ(eth_private_net)を作成する。
↓コマンドを実行
mkdir /home/ユーザー名/eth_private_net
作ったディレクトリに移動する
↓コマンドを実行
cd /home/ユーザー名/eth_private_net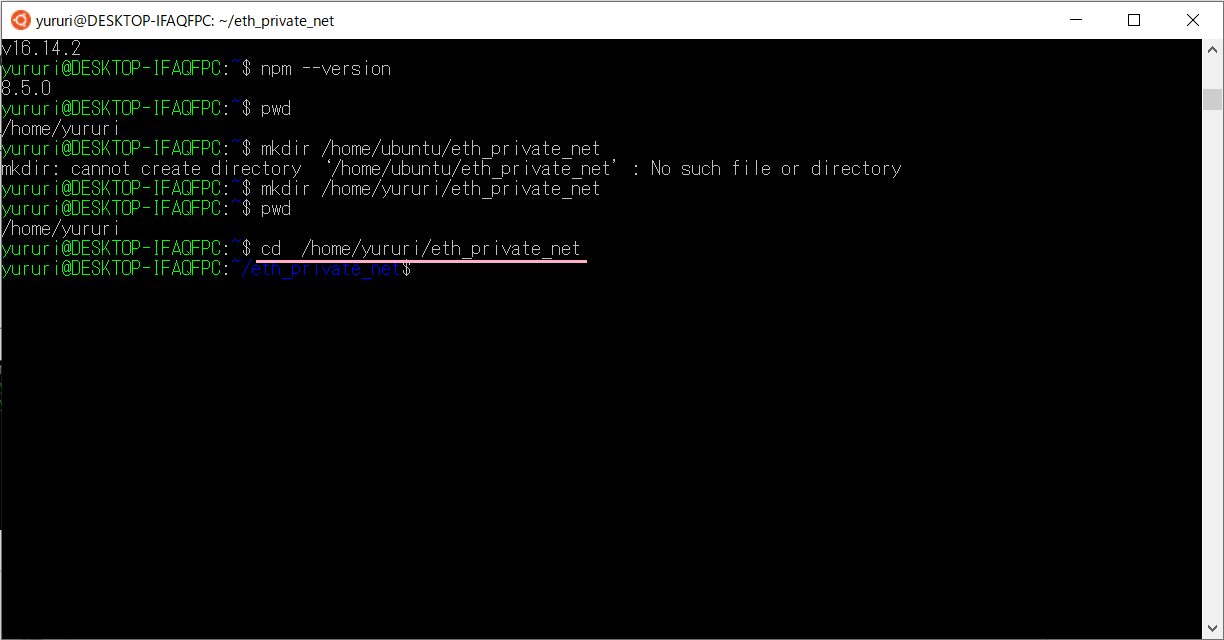
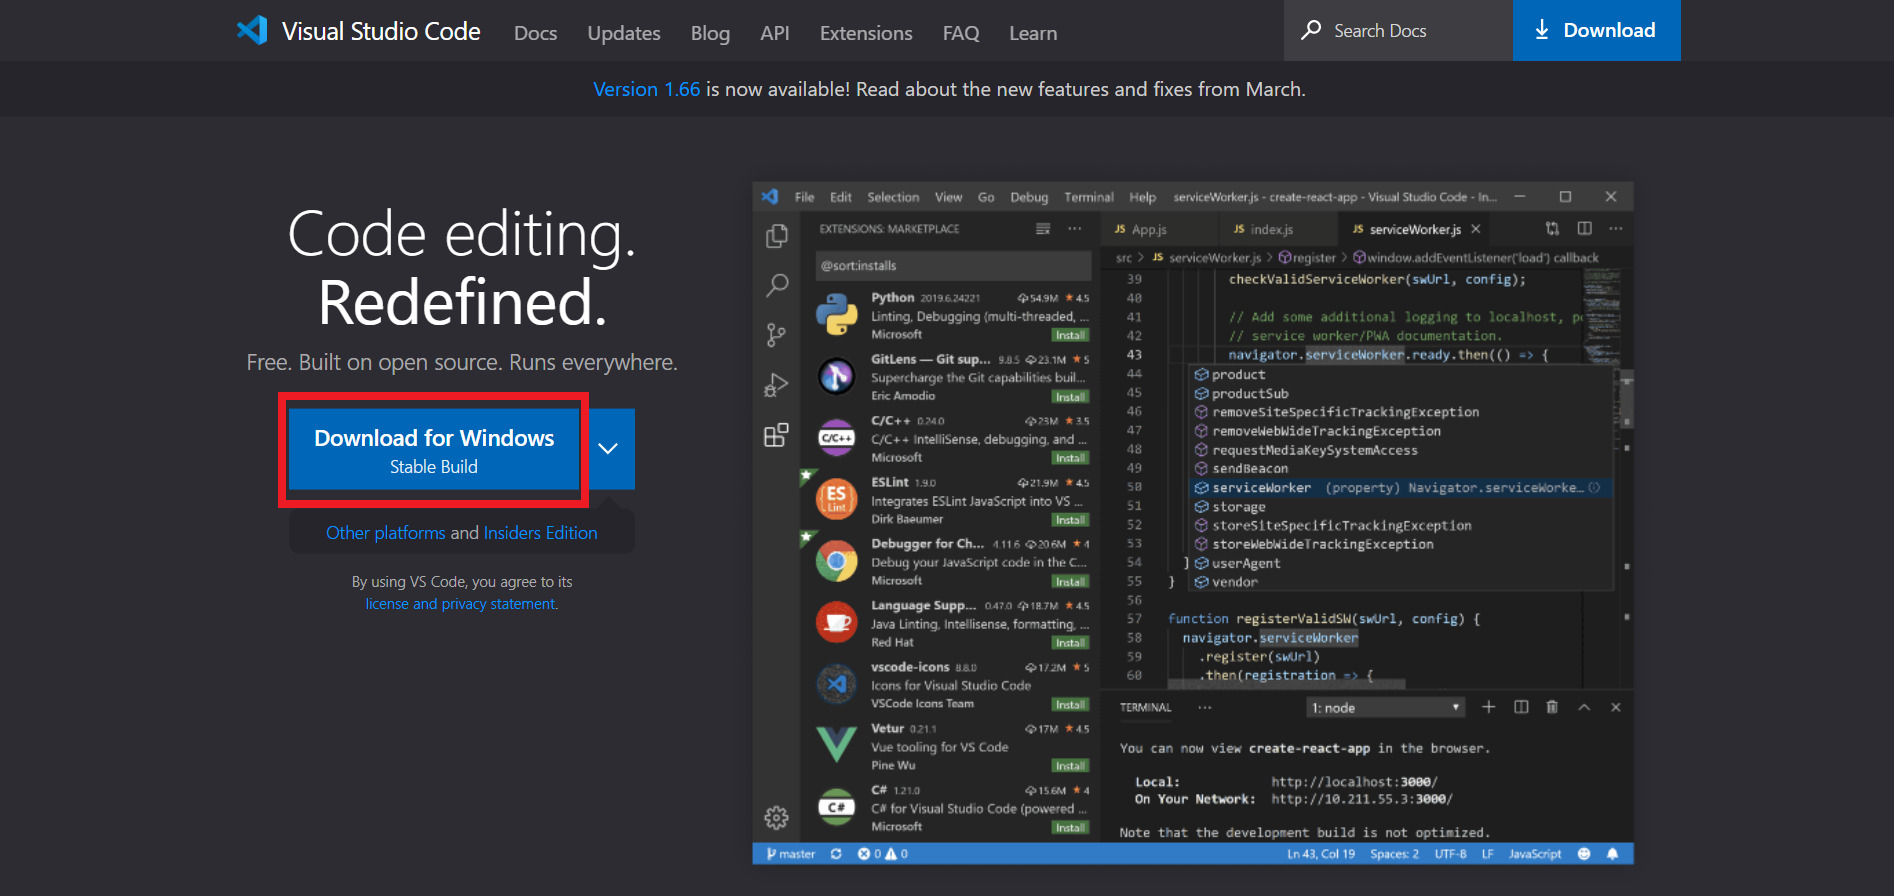
Windows 用の Visual Studio Code をダウンロードしてインストールするのじゃ。
Visual Studio Codeのサイトにアクセスするのじゃ。
プログラマーさんたちはVisual Studio CodeのことをVS Codeと呼んでるみたいです。
Download for Windowsをクリック↓
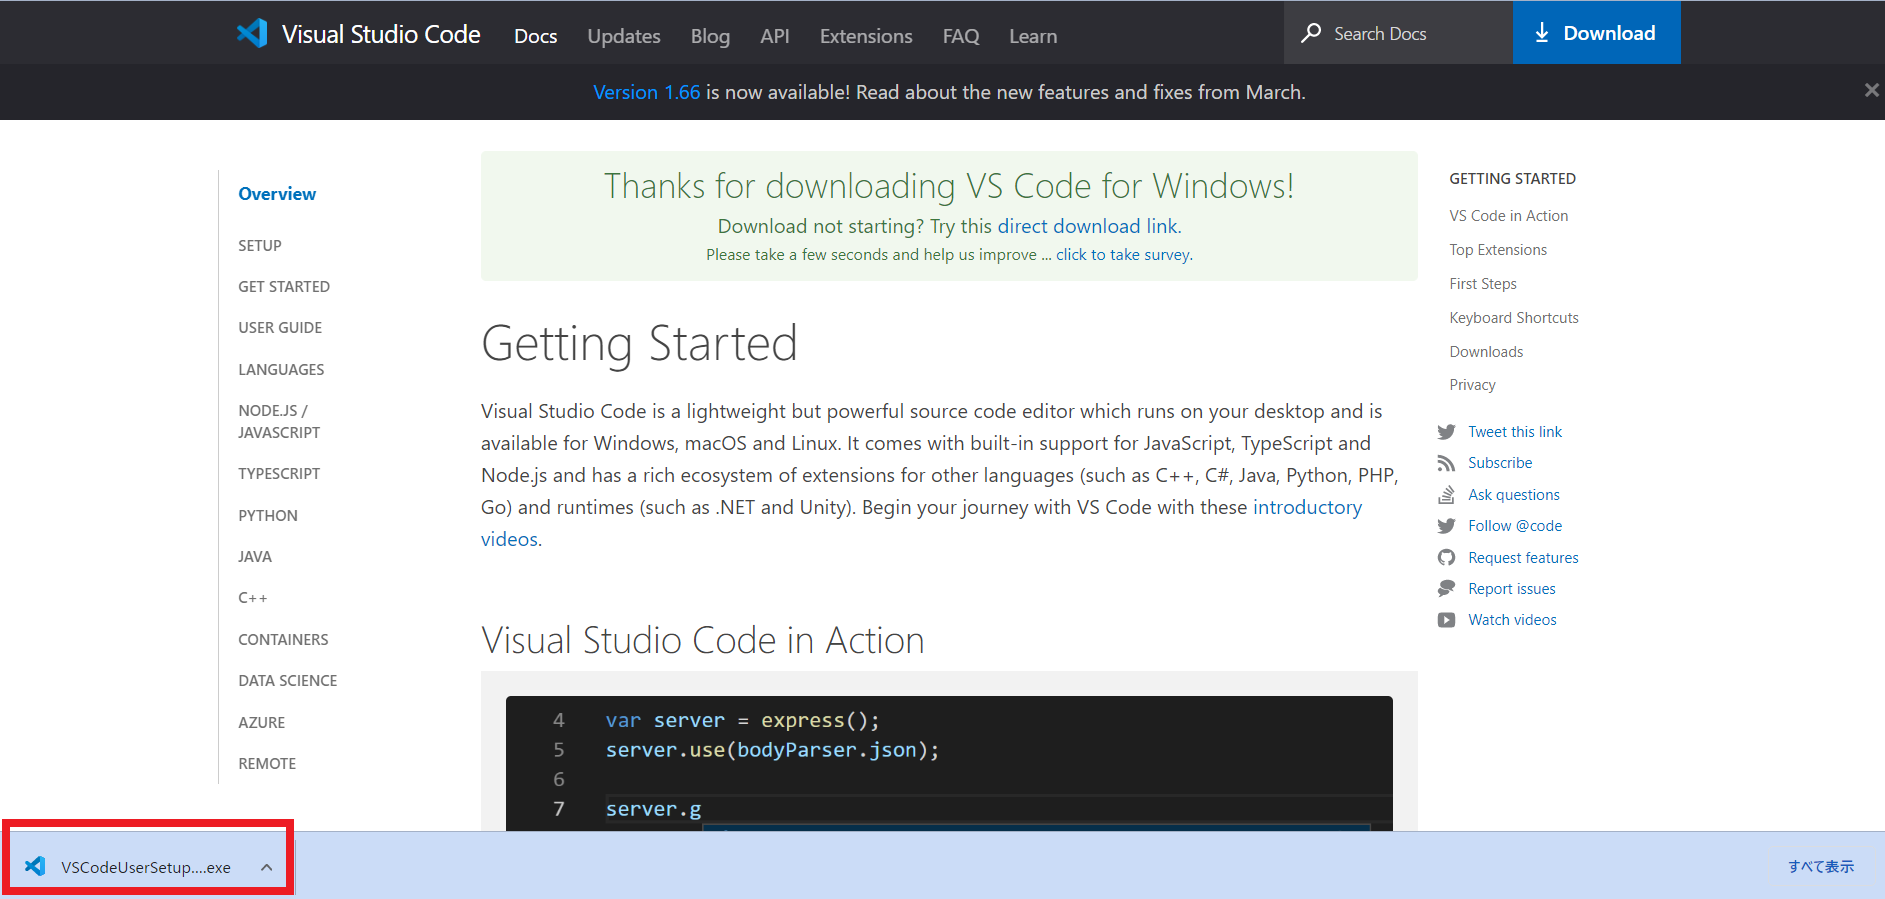
exeファイルをクリックする↓
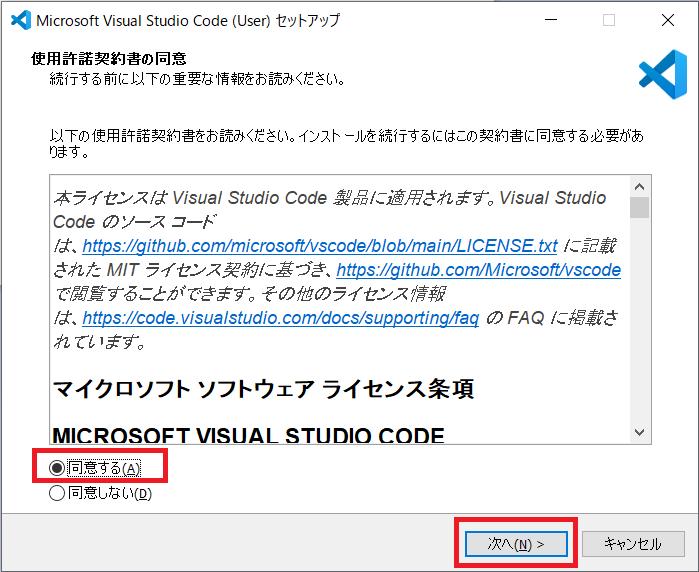
「同意する」を選択して「次へ(N) >」↓
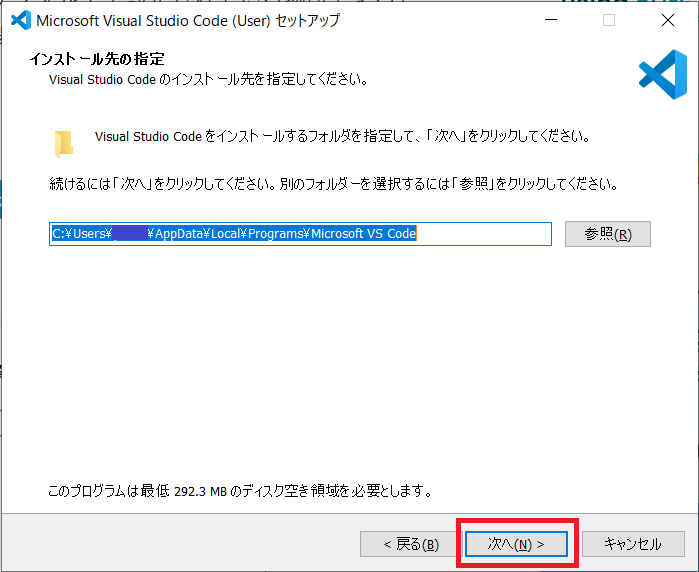
インストール先を確認して、それでよければ「次へ(N) >」をクリック↓
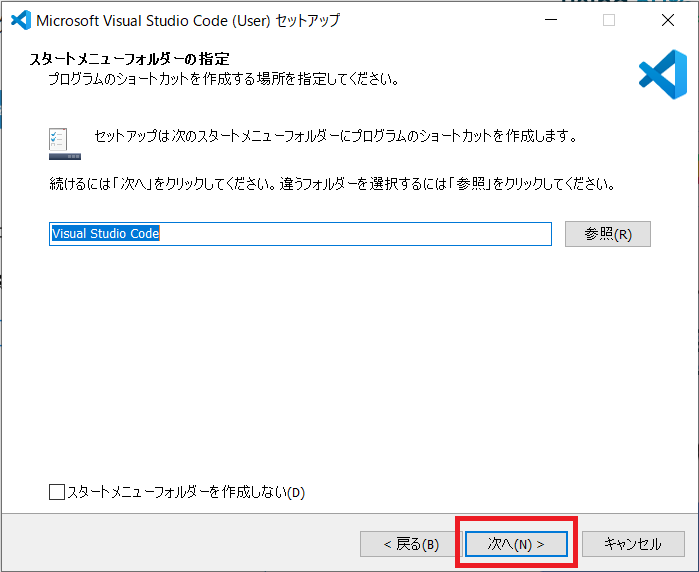
「次へ(N) >」をクリック↓
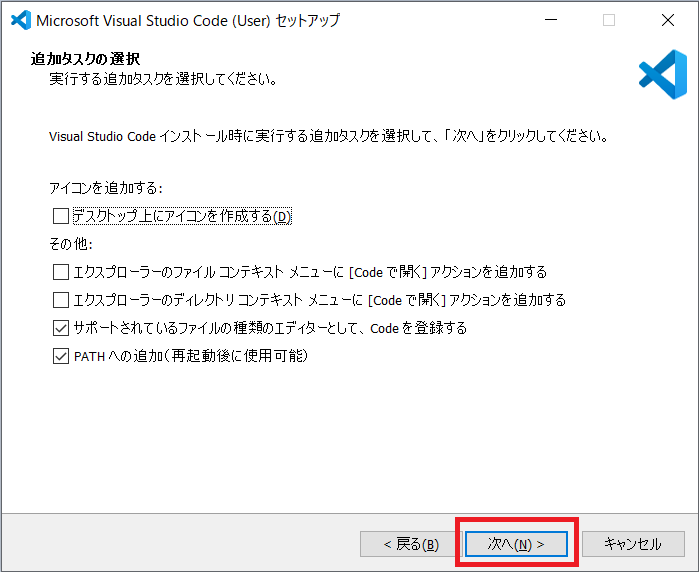
デフォルトのまま「次へ(N) >」をクリック↓
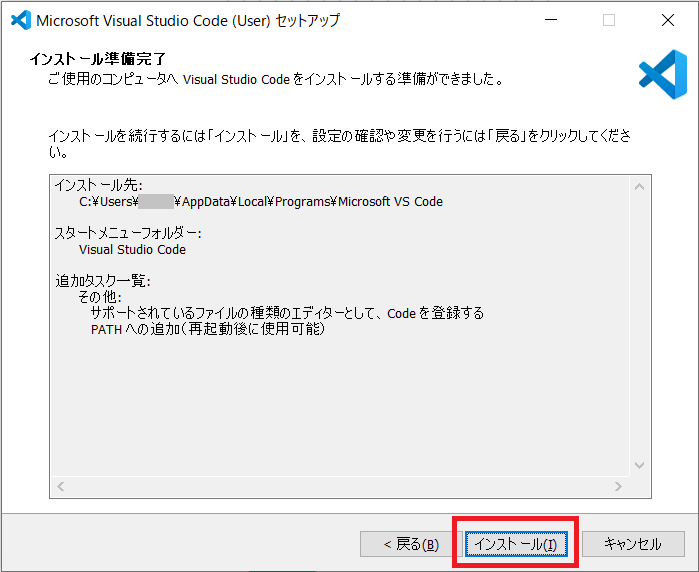
「インストール(I)」をクリック↓
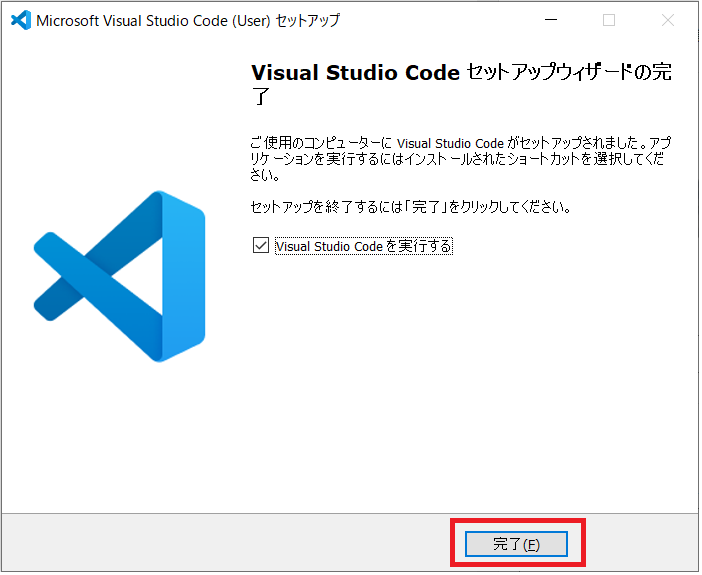
「完了」をクリック↓
Remote – WSL 拡張機能を VS Code にインストールする
①拡張機能を選択
②「Remote – WSL」と入力
③「Remote – WSL」をクリック
④「Install」をクリック↓
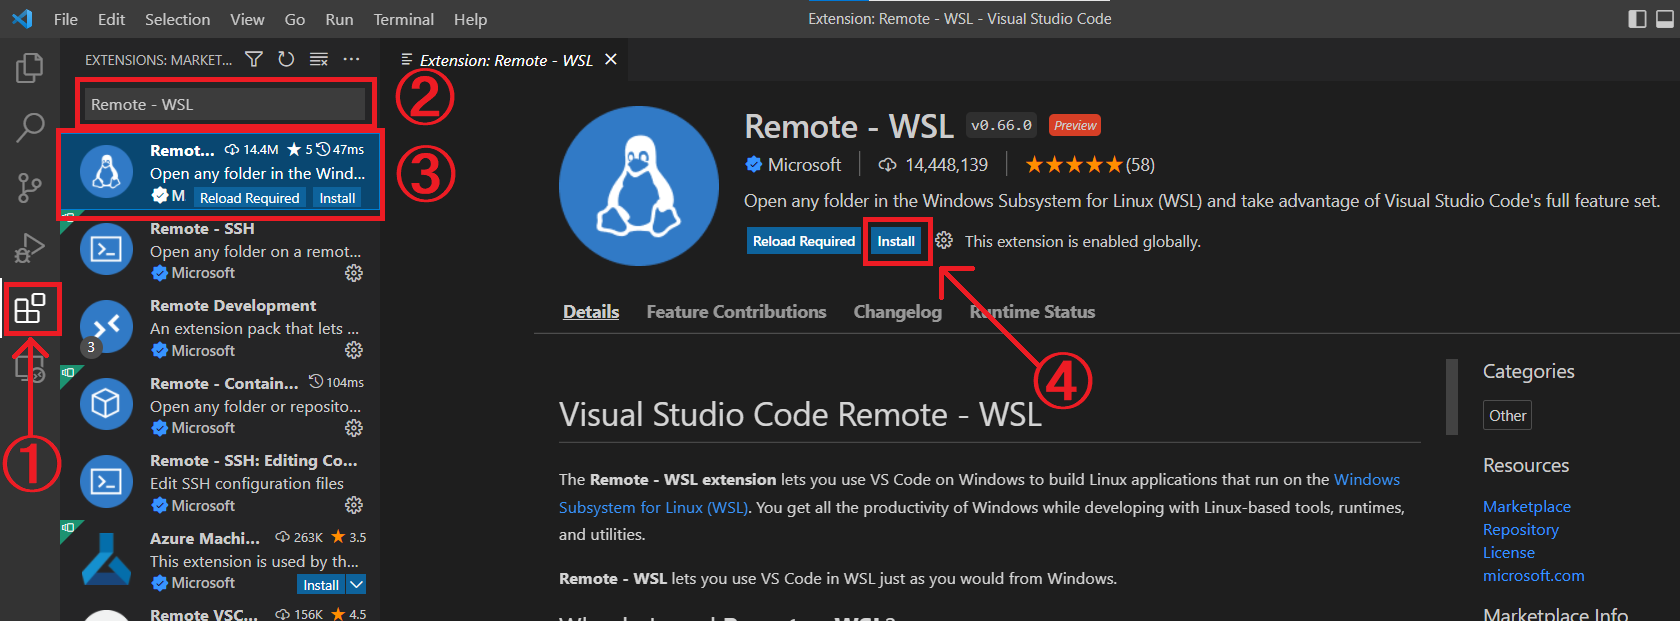
「Install」の部分が最初から「Uninstall」になっている人は、もうインストールされているということなので、この作業は飛ばして大丈夫です。
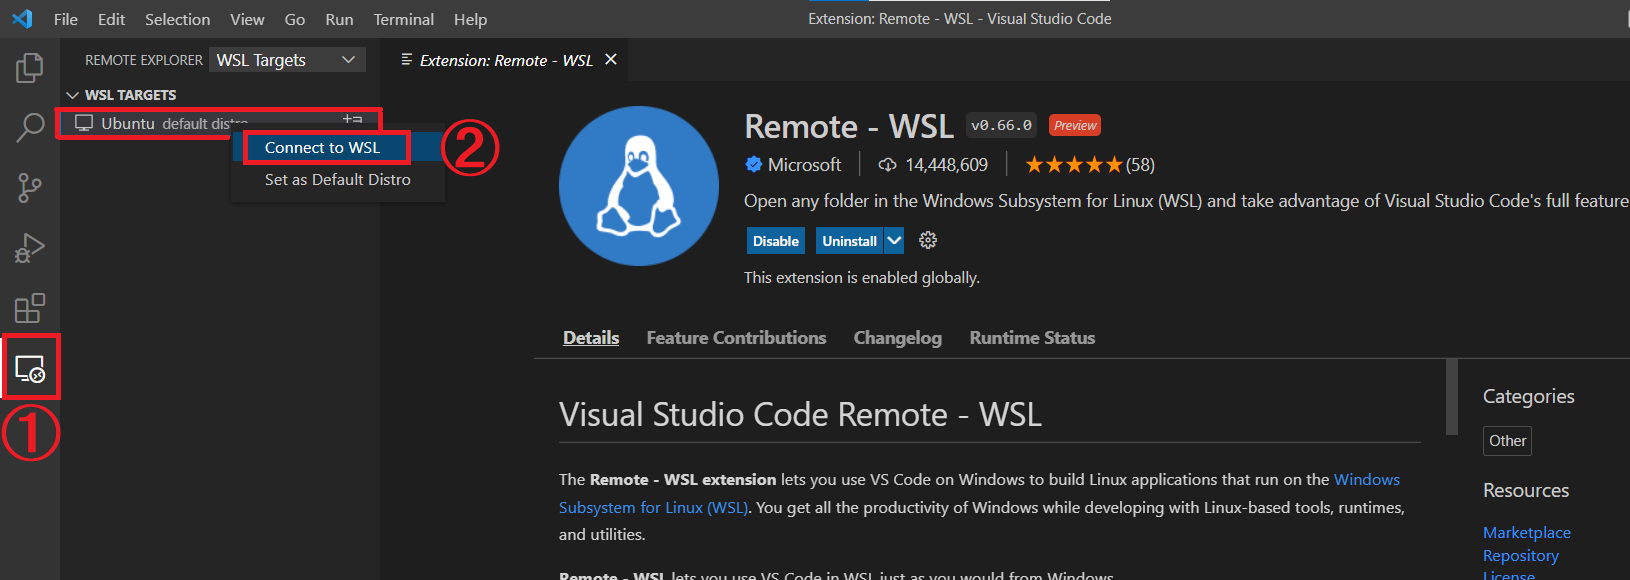
WSL2のUbuntu へ接続
①リモートエクスプローラーを選択
②「Ubuntu」を右クリックすると接続メニューが表示されるので、「Connect to WSL」を選択↓
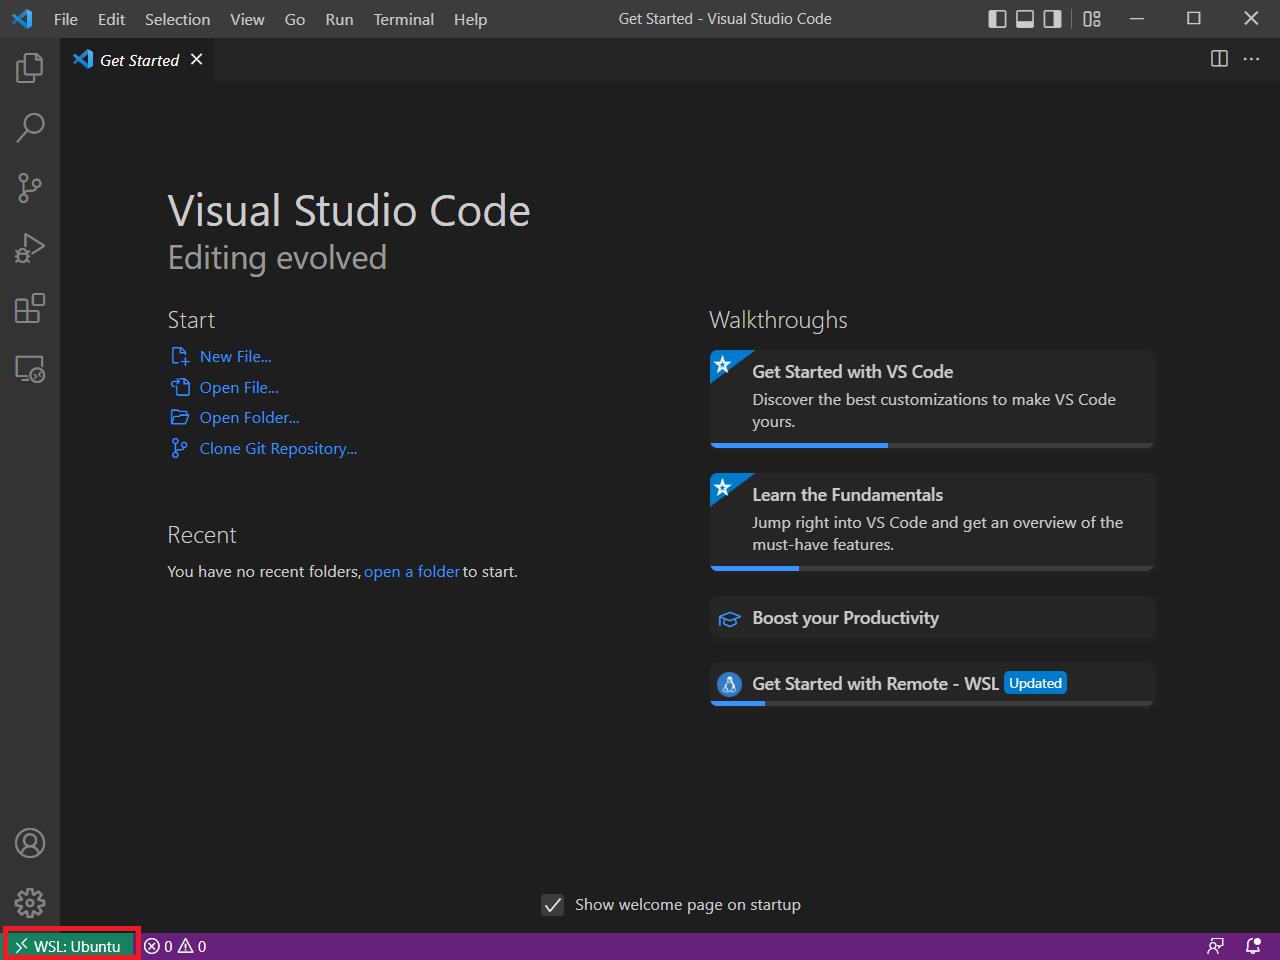
新規でVisual Studio Codeが起動する。
↓左下に「WSL: Ubuntu」と表示されていれば接続完了。
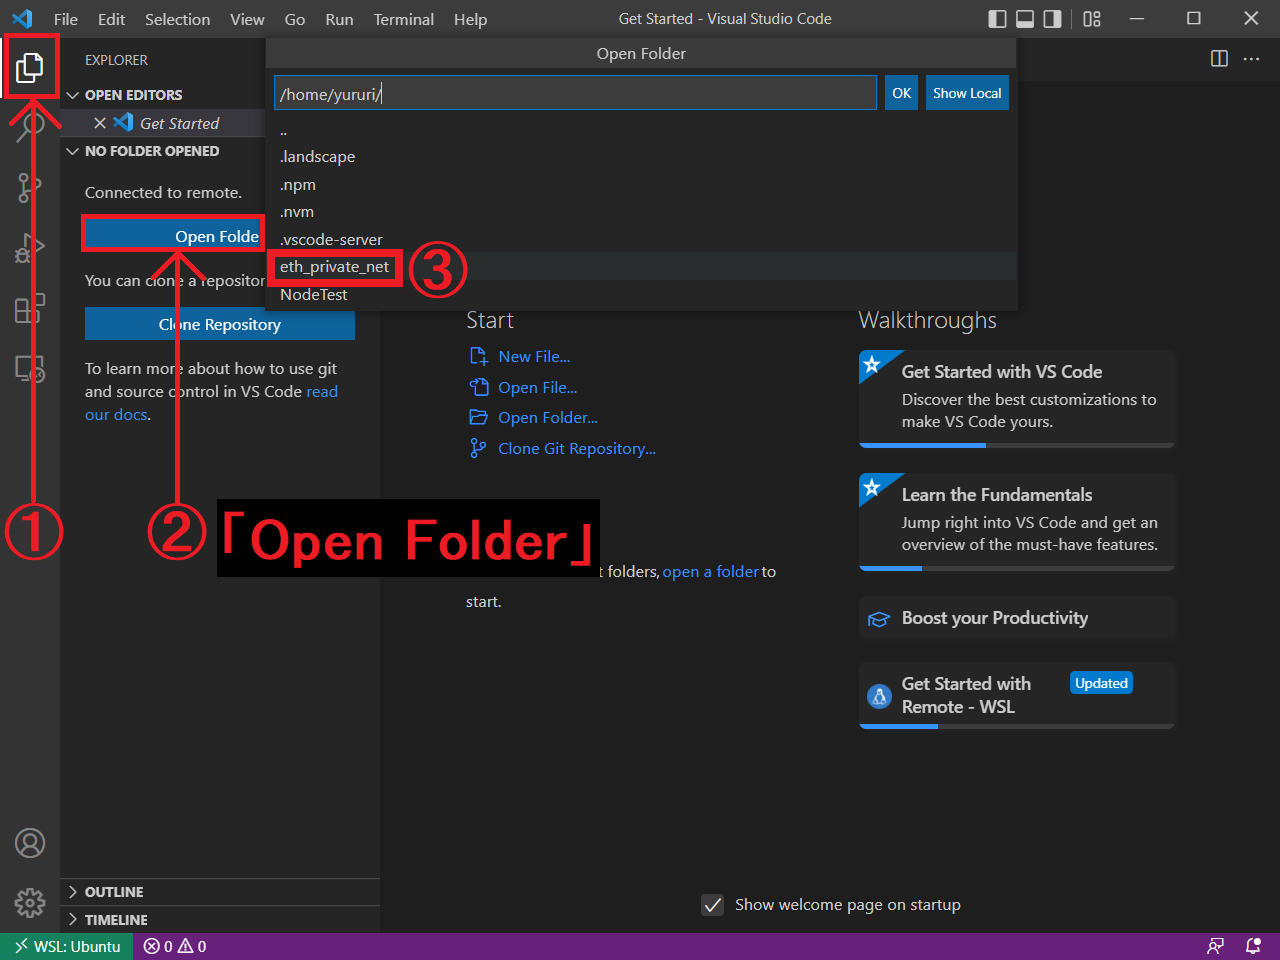
①エクスプローラーを選択
②「Open Folder」をクリック
③「eth_private_net」を選択↓
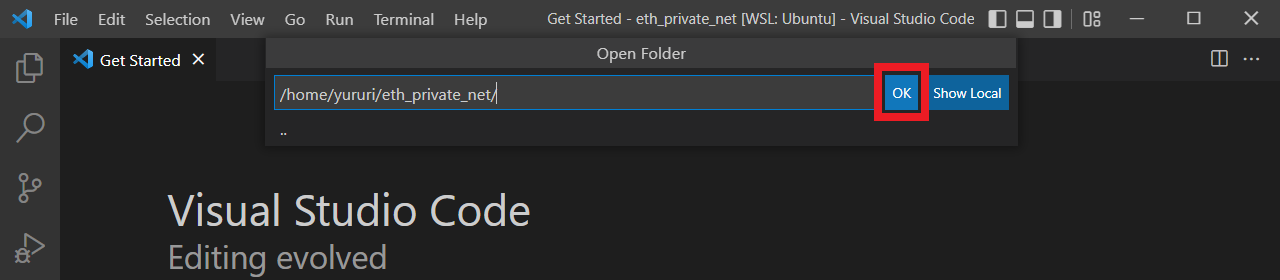
「OK」をクリック↓
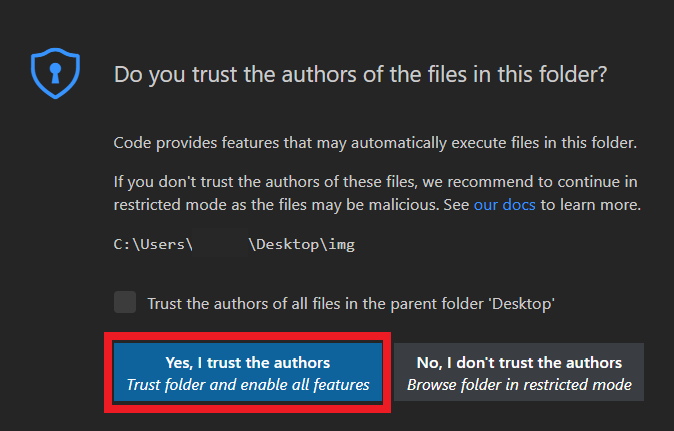
ここで “Do you trust the authors of the files in this folder?”(このフォルダー内のファイルの信頼しますか?という内容の画面が出たら、”Yes,I trust the authors Trust folder and enable all features”(はい、作成者を信頼します フォルダーを信頼してすべての機能を有効にする)という左下の青い四角をクリックする↓
Genesisファイルを作成する
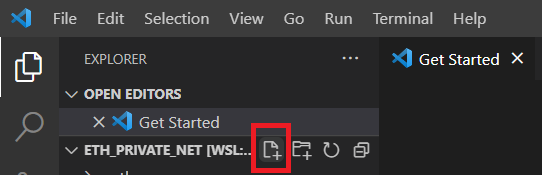
↓「New File」をクリック、「myGenesis.json」と入力しEnter
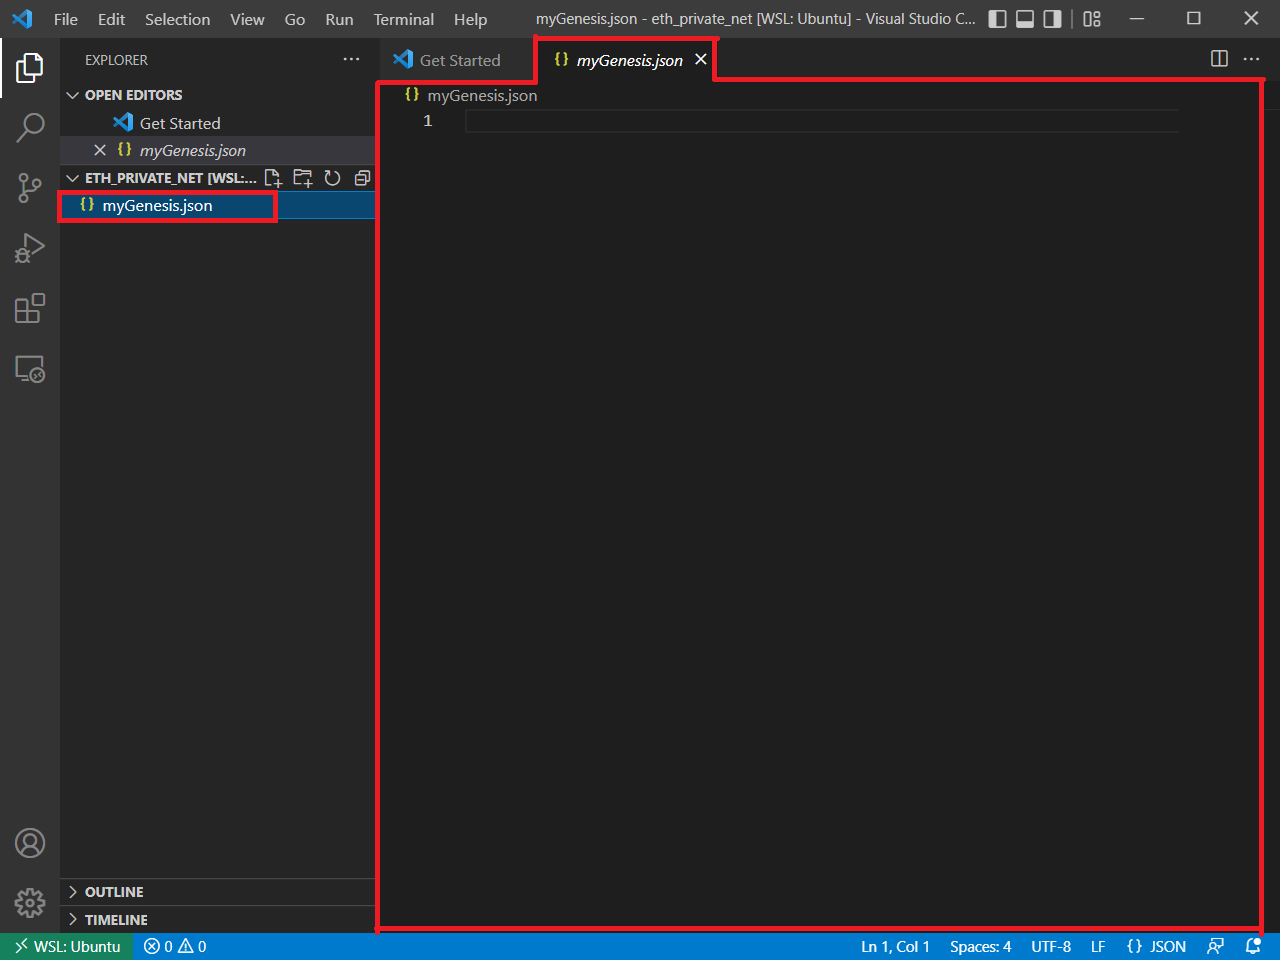
「myGenesis.json」をクリックすると、右側にコードを書き込めるスペースができる↓
下記コードを上記画像の右側にコピペ
Rinkebyネットワーク今回はRinkebyネットワークを使うので、"chainId"は「4」を使用↓
{
  "config": {
     "chainId": 4,
     "homesteadBlock": 0,
     "eip150Block": 0,
     "eip155Block": 0,
     "eip158Block": 0,
     "byzantiumBlock": 0,
     "constantinopleBlock": 0,
     "petersburgBlock": 0,
     "istanbulBlock": 0,
     "berlinBlock": 0
  },
  "nonce": "0x0000000000000042",
  "timestamp": "0x0",
  "parentHash": "0x0000000000000000000000000000000000000000000000000000000000000000",
  "extraData": "",
  "gasLimit": "0x8000000",
  "difficulty": "0x4000",
  "mixhash": "0x0000000000000000000000000000000000000000000000000000000000000000",
  "coinbase": "0x3333333333333333333333333333333333333333",
  "alloc": {}
}
↓
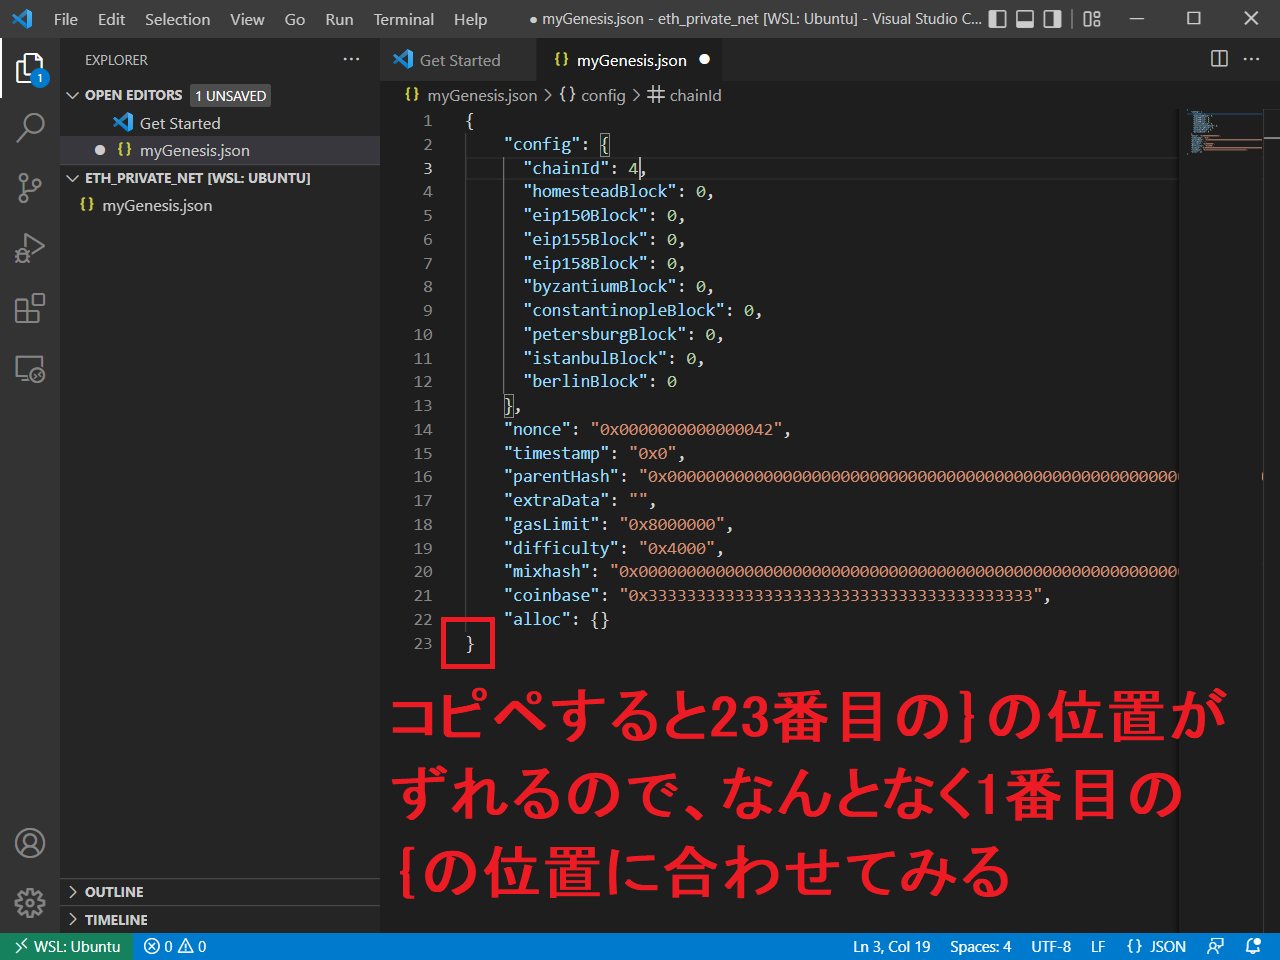
2022.11.20 追記:{}の位置は見やすくするために合わせているということがわかりました。
「Ctrl + S」でセーブする↓

上記画像が出たら、その都度セーブしてください。
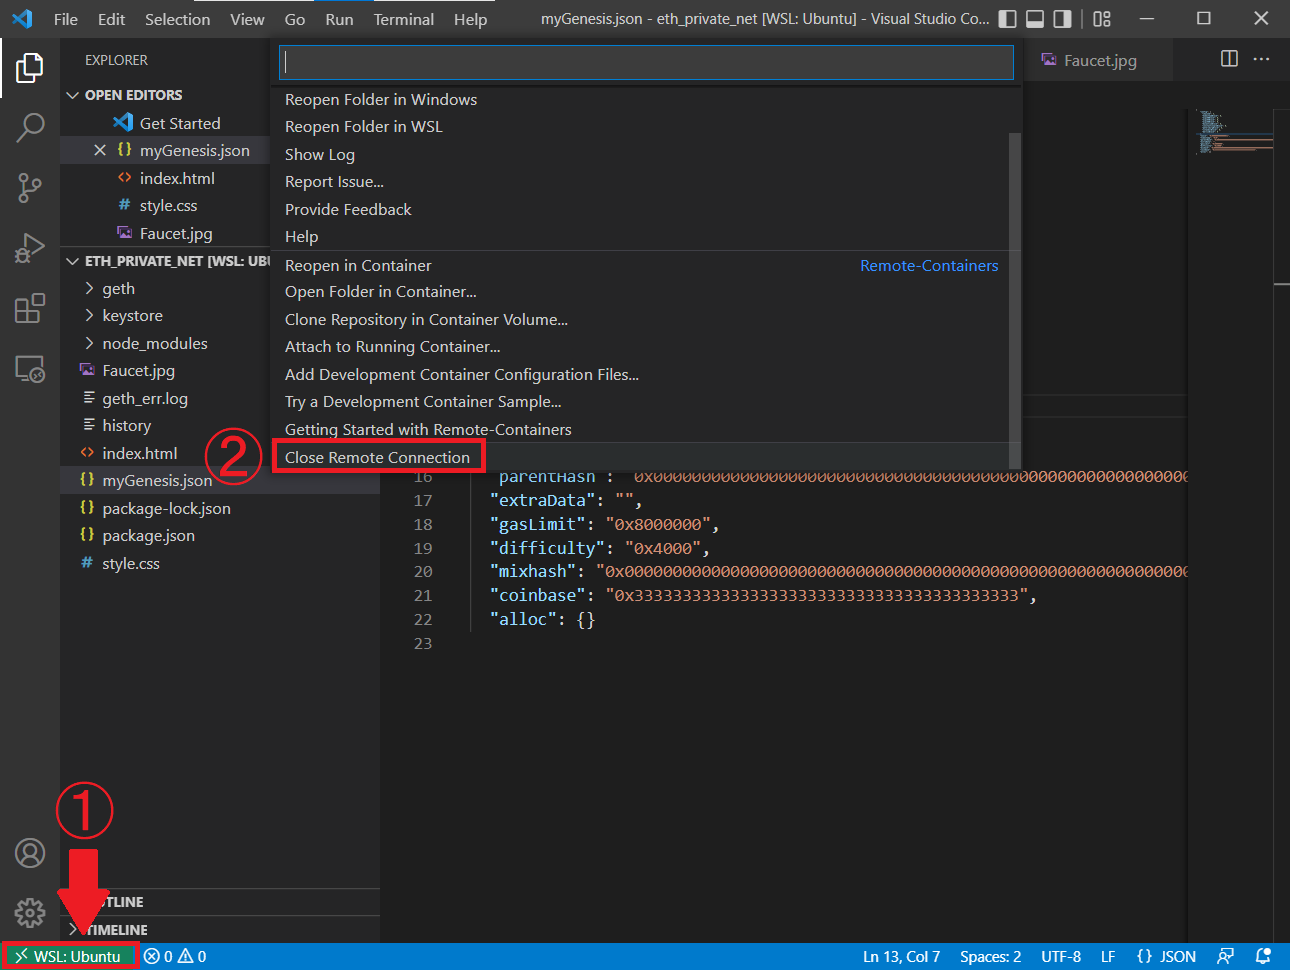
※途中でVS Codeの作業を中断(リモート接続を終了)したいとき
①「WSL:Ubuntu」をクリック
②一番下の「Close Remote Connection」をクリック↓
Gethを使用するためにgenesisブロックの初期化をする。
Ubuntuでコマンドを実行↓
geth --datadir /home/ユーザー名/eth_private_net init /home/ユーザー名/eth_private_net/myGenesis.json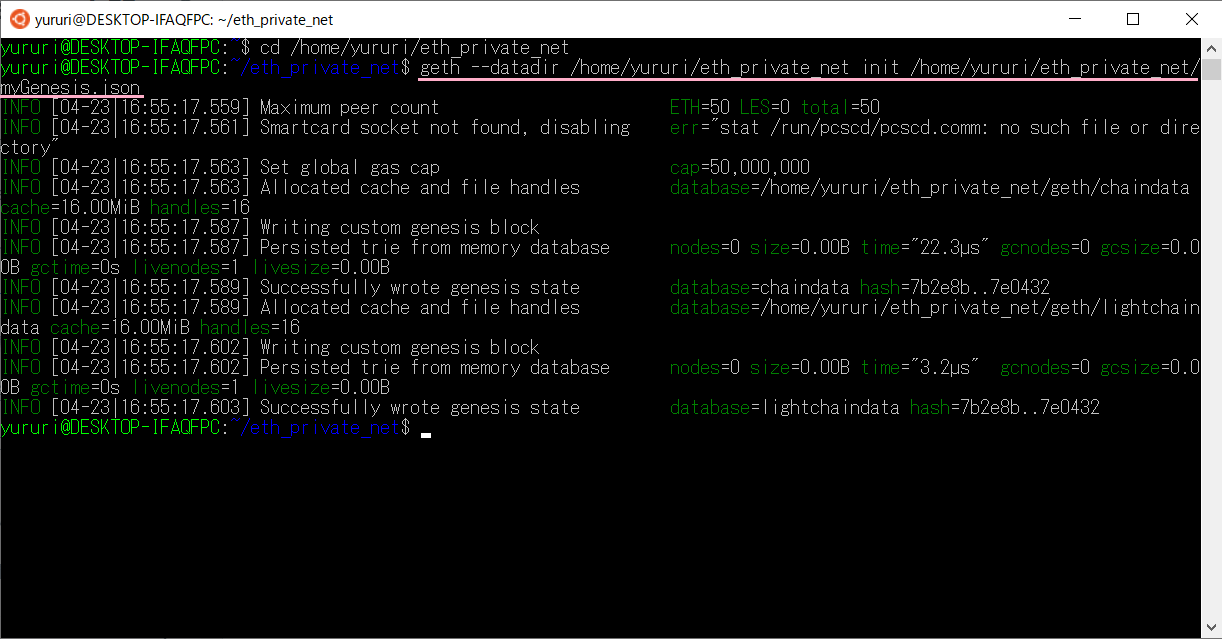
↓ここでVisual Studio Codeを見てみると…
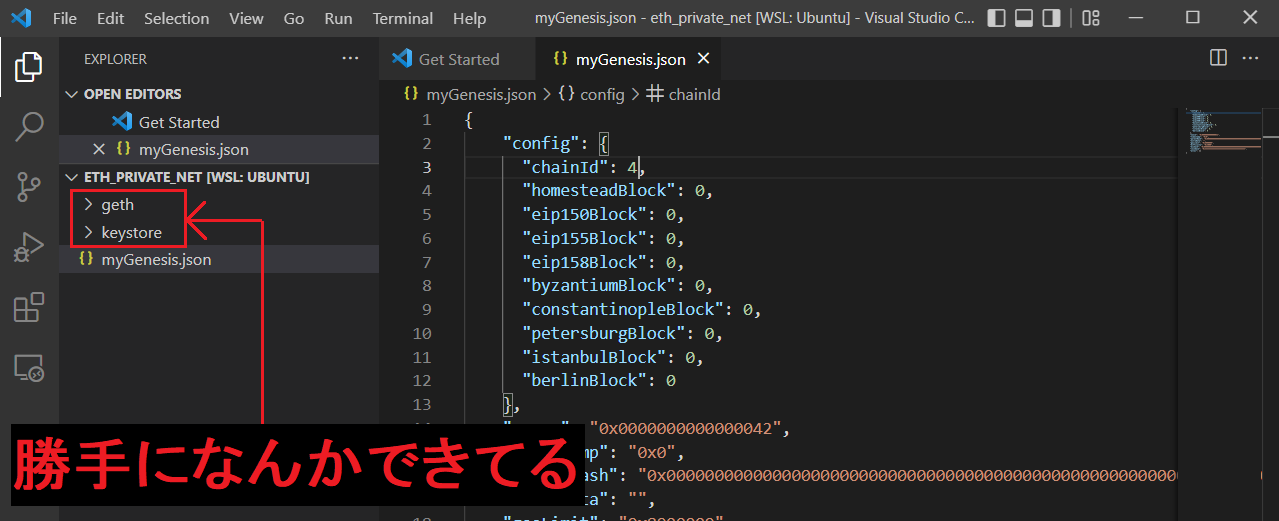
gethとkeystoreのディレクトリがあれば、初期化は成功なのじゃ。
Gethをプライベート(テスト)ネットワークで起動させる
続いてGethをプライベート(テスト)ネットワークで起動し、HTTP-RPCを有効にしておくのじゃ。
Gethを起動すると外部からのAPIを受け付けることができる環境になるのじゃ。
スマートコントラクトを実行するために(web3.jsを使えるようにするために)必要な作業なのじゃ。
gethを起動する。
Ubuntuでコマンドを実行networkidは、Genesisファイルの"chainId"で指定したRinkebyネットワークと同じ「4」にする↓
geth --networkid "4" --nodiscover --datadir "/home/ユーザー名/eth_private_net" console 2>> /home/ユーザー名/eth_private_net/geth_err.log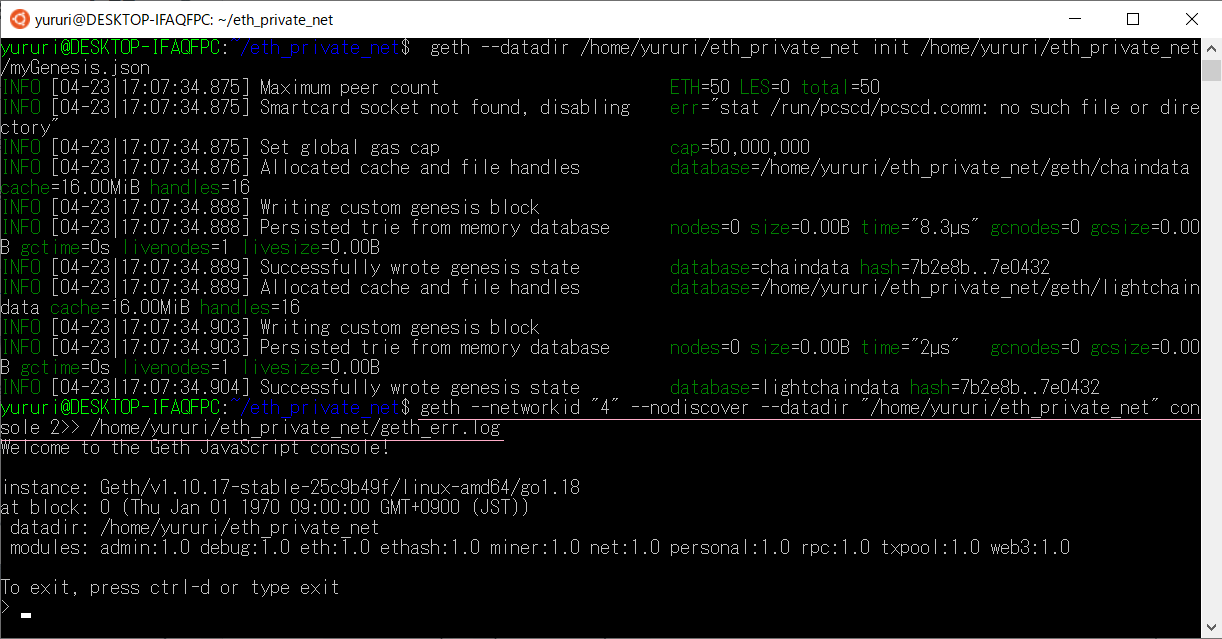
「Ctrl + D」か「exit」と入力して止める↓
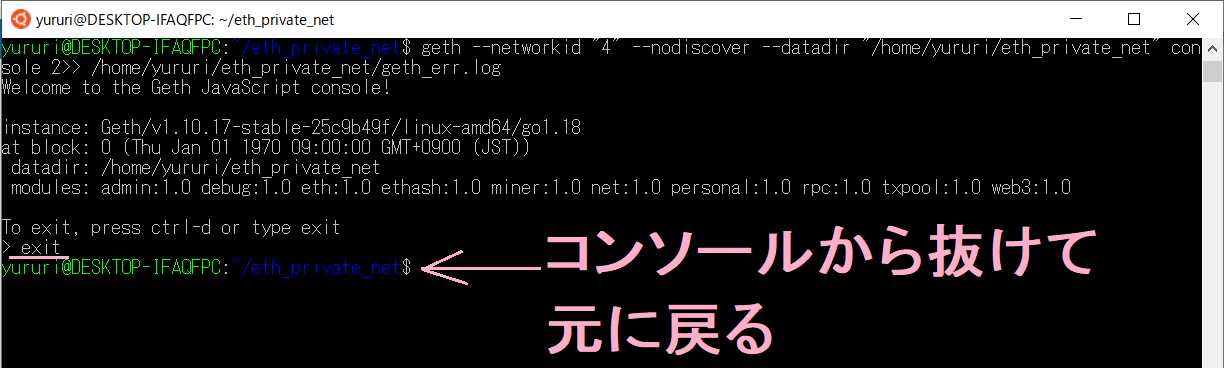
以上がUbuntuへGethを起動させる方法なのじゃ。
お疲れ様なのじゃ。
そして次は…
今日はもう満足したので、続きはまた今度で
|゚Д゚)ノ ジャ、マタ!!
君もお疲れ様なのじゃ(´・ω・)っ旦~
また次回なのじゃ。


ー コメント ー